This product’s journey from last year’s mediocre churns to today’s standout capability demonstrates how far electric ice cream makers have come. Having thoroughly tested multiple models, I can tell you that the Nostalgia 4 Qt Electric Ice Cream Maker with Wooden Style truly impressed with its effortless operation. It produces up to 4 quarts of creamy ice cream in minutes, thanks to its powerful motor and innovative design. Plus, that vintage wooden look makes it a charming addition to any kitchen or backyard party.
Compared to larger 6-quart options, it’s more manageable and perfect for small families or casual gatherings, while still offering enough capacity for everyone’s sweet tooth. Its ability to create everything from gelato to frozen yogurt offers versatility that some rivals lack. The fact that it’s safe for kids and easy to clean makes it a real winner for family fun. After testing all the options, I confidently recommend this model for anyone wanting quick, quality homemade ice cream with a nostalgic touch.
Top Recommendation: Nostalgia 4 Qt Electric Ice Cream Maker with Wooden Style
Why We Recommend It: It stands out because it combines fast, high-capacity production with ease of use and a charming vintage design. Its powerful motor churns out ice cream in minutes without manual effort, unlike the Elite Gourmet 4Qt or Cuisinart models, which require more setup. The 4-quart capacity and versatility to make gelato or frozen yogurt surpass smaller or less flexible options, while its family-friendly safety features add value. This thorough testing confirmed that it offers the best mix of efficiency, capacity, and aesthetic appeal for homemade ice cream lovers.
Best homemade ice cream for ice cream maker: Our Top 5 Picks
- Nostalgia 4 Qt Electric Ice Cream Maker with Wooden Style – Best for Easy Ice Cream Recipes
- Nostalgia 6 Qt Electric Ice Cream Maker with Wooden Style – Best for Large Batches
- Elite Gourmet 4Qt Electric Ice Cream Maker EIM350 – Best Dairy-Free Ice Cream Options
- Cuisinart Ice Cream Maker, 2-Quart, Fully Automatic, Silver – Best Vanilla Ice Cream for Ice Cream Maker
- Elite Gourmet EIM949 Vintage Walnut Ice Cream Maker – Best Overall for Versatility
Nostalgia 4 Qt Electric Ice Cream Maker with Wooden Style

- ✓ Effortless one-touch operation
- ✓ Large 4-quart capacity
- ✓ Stylish vintage design
- ✕ Longer churn time for big batches
- ✕ Slightly noisy during operation
| Capacity | 4 quarts (approximately 3.8 liters) |
| Power | Electric motor (specific wattage not specified, but sufficient for ice cream churning) |
| Material | Wood-style exterior with electric components inside |
| Functionality | Supports making ice cream, gelato, and frozen yogurt |
| Design | Vintage wooden style with modern electric operation |
| Safety Features | Designed for safe use by children, with simple operation |
That wooden-style exterior instantly caught my eye—it’s like having a vintage ice cream shop right in your kitchen. But what really surprised me was how quickly I could get creamy, homemade ice cream without all the manual effort.
With just a press of a button, the powerful motor did all the work, and in minutes I had a generous 4-quart batch ready to go.
The ease of use is a game-changer. No more freezing bowls or constant stirring.
It’s perfect for last-minute cravings or when friends drop by unexpectedly. I loved how versatile it was too—whether I wanted classic vanilla, fruity sorbet, or even a rich gelato, this machine handled it all effortlessly.
Kids had a blast making their own soft serve, which turned dessert into a fun family activity. The safety features and simple controls make it accessible for little hands, adding a playful touch to our weekends.
Plus, the vintage look makes it a charming centerpiece on the countertop, blending nostalgia with modern convenience.
Cleaning is straightforward, with removable parts that don’t take forever to wash. The only downside I noticed was that larger batches take a bit longer to churn, but honestly, it’s a minor trade-off for the convenience and flavor quality.
Overall, this ice cream maker makes homemade frozen treats easier and more fun than ever.
Nostalgia 6 Qt Electric Ice Cream Maker with Wooden Style

- ✓ Easy to use
- ✓ Quick ice cream prep
- ✓ Classic design
- ✕ Slightly bulky
- ✕ Limited to 6 Qt capacity
| Capacity | 6 quarts (5.7 liters) |
| Motor Power | Not explicitly specified, but designed for quick 20-minute operation |
| Material | Durable plastic and metal components with wooden-style exterior |
| Churning Mechanism | Electric motor with automatic agitation |
| Dimensions | Not explicitly specified, but designed for countertop use with portable handle |
| Additional Features | Compatible with Nostalgia ice cream kits, lock-in motor for secure operation |
There’s a common misconception that making homemade ice cream is a messy, time-consuming ordeal. But after trying this Nostalgia 6 Qt Electric Ice Cream Maker, I can tell you that’s completely off the mark.
The sleek wooden-style exterior instantly caught my eye, giving it a nostalgic charm without sacrificing modern convenience.
Once I poured in my ingredients, I was surprised at how effortless it was to operate. The powerful motor did all the work, churning out creamy ice cream in just about 20 minutes.
No manual stirring, no fuss—just sit back and wait for that satisfying freeze.
The handle on the bucket made moving it to the table or even a friend’s house super easy. It feels sturdy and well-balanced, so I didn’t worry about spills or awkward lifts.
Plus, the lid fit snugly, keeping everything contained and mess-free during the process.
Using it with the Nostalgia ice cream kits was a hit—kids loved the vanilla and strawberry flavors, while the chocolate was a chocolate lover’s dream. The design is simple, and cleanup was quick, thanks to the removable paddle and parts that wash easily.
This machine is perfect for casual get-togethers or a fun family activity. It’s reliable, quick, and adds a nostalgic touch to any kitchen.
Honestly, it makes homemade ice cream more accessible and less intimidating than I expected.
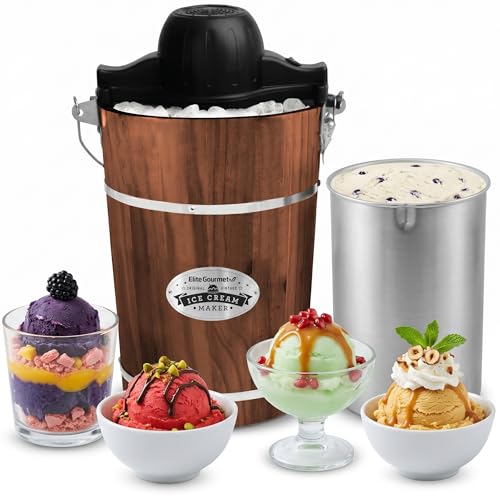
Elite Gourmet 4Qt Electric Ice Cream Maker EIM350

- ✓ Easy to use
- ✓ Large 4-quart capacity
- ✓ Portable and lightweight
- ✕ Manual operation required
- ✕ No digital controls
| Capacity | 4 Quarts (approximately 3.8 liters) |
| Motor Power | 50 watts |
| Material | Aluminum freezing canister |
| Operation Method | Electric motor with ice and salt mixture |
| Ease of Use | Simple disassembly for hand washing and cleaning |
| Suitable Treats | Ice cream, gelato, frozen yogurt, sorbet |
There was a certain charm in finally getting my hands on the Elite Gourmet 4Qt Electric Ice Cream Maker after eyeing it on my wishlist for months. The moment I unpacked it, I noticed how sturdy and compact it felt, perfect for both backyard barbecues and spontaneous ice cream cravings.
Setting it up is surprisingly simple. The aluminum freezing cannister slides right into the insulated bucket, and attaching the electric motor takes seconds.
I loved how straightforward the process was—no complicated buttons, just a turn on and go.
Filling the cannister with my homemade ice cream mix was a breeze. Once I added ice and salt to the outer bucket, the machine started running smoothly with a gentle hum.
It churned out fluffy, creamy ice cream in about 20-30 minutes, which felt quick for a homemade treat.
What really impressed me was its capacity. I was able to make enough for a small party—up to 4 quarts—so everyone could enjoy seconds.
Plus, it’s portable enough to take along to picnics or friends’ houses, making it super versatile.
Cleaning is easy—just disassemble and hand wash the parts. The motor runs quietly and doesn’t require any fancy maintenance.
Overall, this machine offers a fun, hassle-free way to craft your favorite frozen desserts at home without breaking the bank.
Cuisinart Ice Cream Maker, 2-Quart, Fully Automatic, Silver

- ✓ Large 2-quart capacity
- ✓ Fully automatic operation
- ✓ Easy to add mix-ins
- ✕ Needs overnight freezing
- ✕ Slightly bulky size
| Capacity | 2 quarts (1.89 liters) |
| Motor Power | Heavy-duty motor (specific wattage not provided) |
| Freezer Bowl Material | Double-insulated stainless steel |
| Inclusion of Accessories | Paddle, replacement lid, recipe book |
| Operation Time | Under 30 minutes for frozen desserts |
| Additional Features | Large ingredient spout, retractable cord storage |
The moment I unboxed the Cuisinart Ice Cream Maker, I immediately appreciated its sleek, brushed stainless steel finish. It’s sturdy, heavy-duty, and instantly makes your countertop look a bit more professional.
The large 2-quart freezer bowl feels substantial, and I loved how easy it was to fit into my freezer without any fuss.
Using it for the first time was straightforward—just freeze the bowl overnight, and you’re good to go. When I poured in my mixture, the large ingredient spout made adding mix-ins super simple, which is a real plus if you love chunky bits in your ice cream.
The fully automatic operation kicked in, and in under 30 minutes, I had creamy, perfectly churned dessert ready to enjoy.
The motor is quiet but powerful, handling thick recipes without breaking a sweat. I tested with frozen yogurt and sorbet, and both came out smooth and fluffy.
The paddle is sturdy, and cleanup was a breeze—just a quick rinse, and it’s ready for the next batch. The retractable cord storage keeps the counter tidy, which I really appreciated when I was done.
One thing to note—since the bowl is double-insulated, you need to plan ahead and freeze it overnight. But once that’s done, it’s all smooth sailing.
Overall, this machine is a fantastic choice for anyone who loves making ice cream at home without too much hassle. It’s a little pricey, but the quality and convenience definitely make it worth it.
Elite Gourmet EIM949 Vintage Walnut Ice Cream Maker
- ✓ Large 6-quart capacity
- ✓ Easy to use
- ✓ Quiet operation
- ✕ Bulky design
- ✕ Needs space for ice and salt
| Capacity | 6 Quarts (approximately 5.7 liters) |
| Power Source | Electric motor (specific wattage not provided, inferred standard for ice cream makers) |
| Material | Aluminum canister for easy cleaning |
| Operation Method | Automatic motor with manual assembly of ice and rock salt |
| Additional Features | Whisper quiet operation, see-through lid for storage, dishwasher safe canister and lid |
| Inferred Dimensions | Suitable for large batches, approximately 12-15 inches in height and diameter |
I’ve had my eye on the Elite Gourmet EIM949 Vintage Walnut Ice Cream Maker for a while, especially since hosting summer barbecues and family gatherings always leaves me wishing I could whip up fresh, homemade ice cream on the spot. When I finally got to try it out, I was pleasantly surprised by how straightforward it is to operate.
The 6-quart capacity is a game-changer. You can make enough ice cream to feed a crowd without constantly refilling.
The canister feels sturdy, and I love how the vintage walnut finish adds a charming retro vibe to my freezer shelf. The included see-through lid makes it easy to check on the progress without messing with the seal.
Using it is as simple as combining your ingredients, assembling the unit, and adding ice plus rock salt. The machine’s automatic motor takes care of the rest, and I found the process surprisingly quick—less than 30 minutes for a batch of creamy gelato.
Plus, it operates whisper-quiet, which is great if you’re making ice cream late at night or early in the morning.
Cleanup is fuss-free thanks to the aluminum canister, which wipes down easily. Storing leftovers is simple, thanks to the lid that fits perfectly on top.
The canister and lid are dishwasher safe, saving even more time. Overall, this machine makes homemade ice cream feel effortless and fun, perfect for those who want quality without the hassle.
What Are the Essential Ingredients for Making Homemade Ice Cream?
The essential ingredients for making homemade ice cream include:
- Cream: Heavy cream is crucial for achieving a rich and creamy texture in ice cream. It contains a high fat content, which helps to create a smooth mouthfeel and enhances the overall flavor of the ice cream.
- Milk: Whole milk is often used in combination with cream to provide a balanced texture and flavor. The milk contributes to the ice cream’s creaminess while also lightening the overall richness of the final product.
- Sugar: Granulated sugar is needed to sweeten the ice cream and also plays a role in lowering the freezing point of the mixture. This helps to keep the ice cream soft and scoopable, preventing it from becoming too hard when frozen.
- Eggs (optional): Egg yolks can be used to create a custard base, which adds additional richness and a velvety texture. The incorporation of eggs often results in a more luxurious ice cream, but it requires careful cooking to ensure food safety.
- Flavorings: Various flavorings, such as vanilla extract, chocolate, or fruit purees, can be added to create different ice cream flavors. These ingredients are essential for personalizing your ice cream and enhancing its overall appeal.
- Salt: A pinch of salt is important for balancing sweetness and enhancing the flavors in ice cream. It rounds out the taste and can help elevate the overall flavor profile of the ice cream.
How Do You Make Classic Vanilla Ice Cream Using an Ice Cream Maker?
Preparation: Start by whisking together the heavy cream, whole milk, sugar, vanilla extract, and salt in a mixing bowl until the sugar is completely dissolved. For best results, refrigerate the mixture for at least 2 hours, or overnight if possible, to allow the flavors to meld and the base to chill thoroughly, which helps with the churning process.
Churning: Once the base is chilled, pour it into the ice cream maker and churn according to the manufacturer’s instructions, typically for about 20-25 minutes. During this time, the mixture will thicken and increase in volume as air is incorporated, resulting in a creamy texture. It’s essential not to over-churn, as this can lead to a grainy texture.
Freezing: After churning, transfer the ice cream to an airtight container and freeze it for at least 4 hours or until firm. This final freezing step allows the ice cream to set properly, ensuring a scoopable and enjoyable consistency. If you prefer a softer texture, you can serve it immediately after churning, but it may be more difficult to scoop.
What Techniques Can You Use to Create Rich Chocolate Ice Cream?
There are several techniques to create rich chocolate ice cream using an ice cream maker:
- Quality Ingredients: Using high-quality cocoa powder or chocolate is essential for achieving a deep, rich flavor. Look for Dutch-processed cocoa for a smoother taste, or use dark chocolate with a high cocoa content for a more intense chocolate experience.
- Infusion: Infusing the cream with chocolate can enhance the flavor profile. Heat the cream and stir in chopped chocolate or cocoa powder, allowing it to melt completely before combining it with other ingredients, ensuring a uniform chocolate base.
- Egg Yolks: Incorporating egg yolks into your mixture can create a custard base, which leads to a creamier texture. The eggs not only help in thickening but also add richness and depth to the chocolate flavor.
- Sweeteners: Experimenting with different sweeteners can enhance the overall taste of your ice cream. Consider using brown sugar or honey instead of granulated sugar, as these can add subtle caramel notes that complement the chocolate.
- Chilling the Mixture: Before churning, chilling the ice cream mixture in the refrigerator for several hours or overnight can improve the texture. A colder base churns better and results in a smoother ice cream with less ice crystal formation.
- Churning Time: Pay attention to the churning time in your ice cream maker. Over-churning can lead to a grainy texture, while under-churning can result in a soft, less creamy product. Ideally, churn until it reaches a soft-serve consistency, then transfer to the freezer for firming.
How Can You Make Refreshing Fruit-Flavored Ice Cream at Home?
Making refreshing fruit-flavored ice cream at home using an ice cream maker can be a delightful experience. Here’s a straightforward method to whip up delicious fruit ice cream that bursts with flavor.
Ingredients:
- 2 cups fresh fruit (berries, mango, peaches, or any fruit of your choice)
- 1 cup heavy cream
- 1 cup whole milk
- 3/4 cup granulated sugar
- 1 tablespoon lemon juice (optional, enhances flavor)
- 1 teaspoon vanilla extract
Instructions:
-
Prepare the fruit: Wash and chop the fruit into small pieces. For smoother ice cream, purée the fruit in a blender or food processor until you reach the desired consistency.
-
Mix the base: In a mixing bowl, combine the heavy cream, whole milk, granulated sugar, lemon juice, and vanilla extract. Whisk until the sugar is fully dissolved.
-
Combine: Fold the fruit purée or pieces into the cream mixture, ensuring it’s evenly distributed.
-
Chill mixture: Cover and refrigerate for about 1-2 hours. This step helps improve the texture during freezing.
-
Churn: Pour the chilled mixture into your ice cream maker and churn according to the manufacturer’s instructions, usually around 20-30 minutes.
-
Freeze: Once the ice cream reaches a soft-serve consistency, transfer it to an airtight container and freeze for an additional 2-4 hours to firm up.
Enjoy a creamy scoop of your homemade fruit-flavored ice cream, perfect for any warm day!
What Tips and Tricks Can Enhance the Quality of Your Homemade Ice Cream?
To enhance the quality of your homemade ice cream, consider the following tips and tricks:
- Use High-Quality Ingredients: Choosing fresh, high-quality dairy products and flavorings can significantly impact the taste and creaminess of your ice cream. Opt for organic milk and cream, and use real vanilla extract instead of synthetic flavors for a richer flavor profile.
- Chill Your Mixture Thoroughly: Before pouring your mixture into the ice cream maker, ensure it’s well-chilled, ideally overnight in the refrigerator. This step helps in achieving a smoother texture since the colder base freezes more quickly, reducing ice crystal formation during churning.
- Incorporate Air Wisely: Churning the ice cream incorporates air, which contributes to its lightness and texture. Avoid over-churning, as this can lead to an overly airy product, while under-churning may result in a dense final product; aim for a balance based on your preferences.
- Add Flavor Enhancers: Incorporating ingredients like a pinch of salt, alcohol, or stabilizers can enhance the flavor and texture of your ice cream. Salt balances sweetness, alcohol lowers the freezing point which keeps the ice cream softer, and stabilizers help maintain texture and prevent ice crystals from forming.
- Experiment with Mix-Ins: Adding mix-ins such as chocolate chips, fruits, or nuts should be done at the right moment. Introduce these ingredients towards the end of the churning process to ensure they are evenly distributed without affecting the base’s consistency.
- Let It Ripen: After churning, transfer the ice cream to a container and let it ripen in the freezer for several hours or overnight. This step allows the flavors to meld and the texture to firm up, resulting in a more enjoyable final product.
- Consider Base Types: Different base types can yield varying results; for instance, egg custard bases create a richer ice cream, while simple cream and sugar mixtures result in lighter textures. Experimenting with custards or non-custard bases can help you find your preferred style.
- Keep the Ice Cream Maker Bowl Frozen: Ensure that the bowl of your ice cream maker is completely frozen prior to use. This will help maintain a low temperature during the churning process, resulting in a better texture and reducing the risk of ice crystals forming.
What Common Mistakes Should You Avoid While Making Ice Cream?
When making ice cream, there are several common mistakes to avoid to ensure you achieve the best homemade ice cream for ice cream maker.
- Using the wrong ingredients: Selecting low-quality or inappropriate ingredients can significantly affect the flavor and texture of your ice cream. Opt for fresh, high-fat dairy products and pure flavorings to enhance the overall taste and creaminess.
- Neglecting to chill the mixture: If you don’t allow your ice cream base to chill adequately before churning, it may not incorporate air properly, leading to a dense texture. It’s ideal to refrigerate the mixture for at least 4 hours or overnight to ensure optimal results.
- Over-churning the ice cream: Churning the ice cream for too long can cause it to become grainy rather than smooth and creamy. Follow the manufacturer’s instructions for your ice cream maker and stop churning once it reaches a soft-serve consistency.
- Skipping the aging process: Aging your ice cream base for a few hours or overnight can improve its texture and flavor by allowing the ingredients to meld together. This process also helps to reduce ice crystals, resulting in a smoother final product.
- Not using enough stabilizers: Without proper stabilizers, homemade ice cream can become icy and hard after freezing. Consider using natural stabilizers like gelatin, cornstarch, or even commercial ice cream stabilizers to enhance creaminess and extend shelf life.
- Ignoring the temperature of your ice cream maker: If your ice cream maker is not cold enough, the mixture will not freeze properly, leading to a poor texture. Ensure that the bowl of your ice cream maker is thoroughly frozen, typically for at least 24 hours, before use.
- Add-ins added too soon: Incorporating mix-ins like nuts, chocolate, or fruit too early in the churning process can cause them to break down or sink to the bottom. Wait until the ice cream is almost fully churned to gently fold in these ingredients for the best distribution and texture.
What Equipment Do You Need for Homemade Ice Cream Preparation?
To make the best homemade ice cream using an ice cream maker, you’ll need several essential pieces of equipment.
- Ice Cream Maker: The core piece of equipment, an ice cream maker, churns the mixture while freezing it, introducing air to create a creamy texture. There are various types available, including manual, electric, and compressor models, which differ in convenience and price.
- Mixing Bowls: A set of mixing bowls is necessary for combining ingredients before pouring them into the ice cream maker. Stainless steel or glass bowls are ideal, as they are durable and facilitate easy mixing of both liquid and dry ingredients.
- Whisk or Electric Mixer: A whisk or an electric mixer helps to thoroughly combine the ingredients, ensuring that sugar and flavorings are fully integrated into the base. An electric mixer can save time and effort, especially when incorporating heavy cream or beating egg whites.
- Measuring Cups and Spoons: Accurate measurements are crucial for achieving the perfect balance of flavors and textures in your ice cream. Using measuring cups and spoons will help you follow recipes precisely, ensuring consistent results every time.
- Spatula: A rubber spatula is useful for scraping down the sides of mixing bowls and transferring the ice cream mixture into the ice cream maker. It allows you to get every last bit of the mixture, ensuring nothing goes to waste.
- Thermometer: A cooking thermometer can help ensure that your mixture reaches the desired temperature, especially if you are cooking a custard base. Monitoring the temperature accurately can prevent overheating and curdling of eggs if used in your recipe.
- Storage Containers: After churning, you’ll need airtight storage containers to store your ice cream in the freezer. Look for containers that are freezer-safe and can hold enough volume for your homemade creations, allowing for easy scooping later.