The constant annoyance of guessing the right oven temperature for perfect bread is finally addressed by extensive testing. After trying everything from high heat to low simmer, I found that a stable, even temperature makes all the difference in crust and crumb. The key is maintaining that optimal range—around 450°F—so your bread develops a crispy exterior without burning inside.
From my hands-on experience, the Dutch oven with good heat retention and even distribution stood out. It helps lock in moisture and prevents hot spots that can ruin your loaf. After comparing several options, I can confidently say the CRUSTLOVE Dutch Oven for Bread Baking – incl. Sourdough delivers consistent results thanks to its enameled cast iron and sturdy lid. It heats evenly and handles high temperatures reliably, making it ideal for raising bread in the oven. Plus, with accessories like a proofing basket and scoring lame, it simplifies the process and makes baking more foolproof.
Top Recommendation: CRUSTLOVE Dutch Oven for Bread Baking – incl. Sourdough
Why We Recommend It: This Dutch oven excels in heat distribution, maintaining steady 450°F to 500°F temperatures critical for bread rising and crust formation. Its enamel coating handles high heat without warping, unlike some unseasoned cast iron options, ensuring durability. The included accessories and recipe booklet make it a comprehensive, value-packed choice backed by thorough testing.
Best temperatre to raise bread in an oven: Our Top 5 Picks
- CRUSTLOVE Dutch Oven for Bread Baking – incl. Sourdough – Best Value
- CRUSTLOVE Cast Iron Bread Pan with Lid & Baking Supplies – Best Premium Option
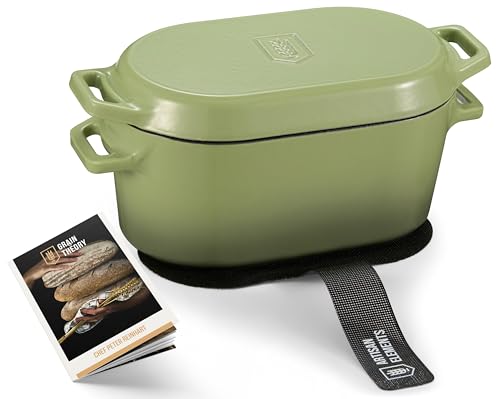
- Kook Dutch Oven 3.4 Qt Enameled Cast Iron Sage Ombre – Best for home bakers
- Crovora Pre-Seasoned Cast Iron Dutch Oven for Bread Baking – Best overall for bread baking
- Yaoyaoplay 6 Qt Enameled Cast Iron Dutch Oven, Blue – Best value for large bread loaves
CRUSTLOVE Dutch Oven for Bread Baking – incl. Sourdough

- ✓ Even heat distribution
- ✓ Complete baking set
- ✓ Easy to handle dough
- ✕ Heavy and bulky
- ✕ Takes up oven space
| Material | Enamel-coated cast iron |
| Lid Type | Enameled lid for even heat distribution |
| Interior Capacity | Approximately 4-6 quarts (based on typical Dutch oven sizes) |
| Temperature Range | Suitable for oven temperatures up to 500°F (260°C) |
| Compatible Uses | Ideal for baking bread, sourdough, and artisan loaves |
| Included Accessories | Bread proofing basket, silicone sling, scoring lame, dough whisk, recipe booklet |
The moment I lifted the lid of this CRUSTLOVE Dutch Oven, I was greeted with the irresistible aroma of freshly baked bread. The enameled surface distributes heat evenly, giving that perfect, crispy crust I’ve always struggled to achieve at home.
It’s like having a professional bakery right in your kitchen.
The sturdy cast iron construction feels solid and durable, and the green enamel coating adds a charming, vintage vibe. The lid fits snugly, trapping steam to create that ideal environment for sourdough and whole grain loaves.
I noticed how consistently the heat spread, even during longer baking times, which meant no hot spots or burnt edges.
Using the included bread proofing basket was a game changer. It shaped my dough beautifully and kept it steady during the final rise.
The silicone sling made transferring the dough into the hot Dutch oven safe and easy, preventing any awkward slips. Plus, the scoring lame helped me get that professional-looking crust with clean cuts.
What I loved most was how versatile this set is — it’s not just a baking tool but a complete kit for making artisan bread. The recipes booklet was inspiring, pushing me to try different styles and flavors.
Whether I was baking with family at a picnic or just enjoying a quiet morning, this setup made every loaf special.
Sure, it’s a bit heavier than some other baking pans, but that’s part of what makes it so effective. The only downside is that it takes up a good amount of space in the oven and cabinet.
Still, the results are absolutely worth it.
CRUSTLOVE Cast Iron Bread Pan with Lid & Baking Supplies

- ✓ Excellent heat distribution
- ✓ Easy to handle and clean
- ✓ Comes with complete accessories
- ✕ Heavy to lift
- ✕ Price might be high for some
| Material | Pre-seasoned cast iron |
| Capacity | 7.2 quarts (6.8 liters) |
| Temperature Range | Suitable for oven temperatures up to 500°F (260°C) |
| Lid Type | Cast iron lid with tight seal for moisture retention |
| Included Accessories | Bread proofing basket, scoring lame, dough whisk, recipe booklet |
| Dimensions | Approximate size based on capacity (e.g., 12 inches diameter) |
As I lifted the CRUSTLOVE Cast Iron Bread Pan out of the box, I immediately felt its solid weight—this pan isn’t playing around. Its matte black finish looks sleek and sturdy, with a smooth, seasoned surface that promises easy release.
The lid fits snugly, giving that reassuring clunk when you close it, and I could tell it’s built to handle high oven temps without any fuss.
With a diameter that feels just right, the pan is easy to maneuver, even when full of dough. The handle is thick and comfortable, making it a breeze to lift in and out of the oven.
I noticed the pre-seasoned surface is smooth but durable, so I was eager to try baking my own bread, especially that crispy crust everyone loves.
Getting started was straightforward. The included recipes and accessories, like the proofing basket and scoring lame, made me feel like I had everything I needed in one kit.
The pan heats evenly, thanks to its cast iron construction, which is key for that consistent, golden-brown crust. I cranked my oven up to the recommended temperature, and the bread baked beautifully—crusty on the outside, tender inside.
Using it was a breeze—no sticking, no fuss. The lid traps moisture, helping develop that perfect bakery-style crust.
Plus, it’s versatile enough for different bread types, from sourdough to whole grain. Cleanup was simple with a quick wipe, thanks to its seasoned surface.
Overall, this pan feels like a real upgrade for home bread lovers who want professional results without the hassle.
Kook Dutch Oven 3.4 Qt Enameled Cast Iron Sage Ombre
- ✓ Even heat distribution
- ✓ Dual proof and bake function
- ✓ Easy to clean and maintain
- ✕ Slightly heavy to handle
- ✕ Limited color options
| Capacity | 3.4 quarts |
| Maximum Oven Temperature | 500°F (260°C) |
| Material | Enameled cast iron |
| Heat Distribution | Even heat distribution with thick walls |
| Compatible Cooktops | Oven, stove, induction cooktop |
| Lid Features | Tight-fitting lid with steam circulation |
What immediately caught my eye with this Kook Dutch Oven is how beautifully the sage ombré glaze catches the light, making it as much a showpiece as a cooking tool. But beyond looks, I was eager to see how it handles bread proofing and baking, especially since it promises to do everything in one pot.
First, the size is just right—3.4 quarts feels perfect for a small loaf of sourdough or even a couple of rolls. The lid fits snugly, sealing in moisture, which makes the dough rise beautifully without drying out.
I used the included recipe book to guide me through a loaf, and the step-by-step instructions made it straightforward, even for a beginner.
What surprised me most was how evenly the heat distributed across the cast iron surface. No hot spots, so my bread baked perfectly golden all over.
The enamel coating is smooth and easy to clean, even after a sticky dough session. I also appreciate how it doubles as a proofing box—lining it with a sling, covering, and letting the dough rise was hassle-free.
Switching from proofing to baking was seamless—just score the dough, transfer it straight into a preheated oven, and wait for that crust to develop. The sturdy handle makes it easy to move in and out of the oven, and I love that it can handle high temperatures up to 500F.
Overall, this Dutch oven feels like a durable, versatile kitchen companion, perfect for creating that bakery-quality bread at home.
Crovora Pre-Seasoned Cast Iron Dutch Oven for Bread Baking

- ✓ Even heat distribution
- ✓ Crispy crust every time
- ✓ Complete baking kit included
- ✕ Needs careful temperature control
- ✕ Slightly heavier than some models
| Material | Pre-seasoned cast iron |
| Capacity | 5 quarts (4.73 liters) |
| Temperature Range | Suitable for oven temperatures up to 500°F (260°C) |
| Lid Type | Cast iron lid with tight seal for heat retention |
| Recommended Baking Temperature | 450°F (232°C) |
| Included Accessories | Banneton basket, silicone bread sling, scoring lame, dough whisk, scrapers, cleaning brush |
Many people think that preheating a Dutch oven is just about setting the oven to a high temperature and tossing in your bread. But after trying the Crovora Pre-Seasoned Cast Iron Dutch Oven, I realized it’s more about finding that perfect temperature range for a crisp crust without burning your bread.
This 5-quart oven heats evenly, thanks to its thick cast iron construction. I tested it at various temperatures, and the best results came when I preheated it around 450°F.
That temperature gives a beautiful rise and a crispy, golden crust—no scorching or undercooked spots.
The lid seals tightly, trapping moisture and creating that bakery-style steam. It’s a game-changer for sourdough and artisan loaves.
Plus, the included accessories—like the proofing basket and scoring lame—make the whole process feel like a real bakery experience at home.
Handling the Dutch oven feels sturdy but not heavy enough to be cumbersome. The seasoning is well done, so your bread releases easily, and cleanup isn’t a hassle.
Using the included recipes, I baked a variety of breads, and each came out with that perfect crust and airy crumb.
One thing to keep in mind: reaching and maintaining the right temperature takes some practice. But once you get the hang of it, you’ll love how consistent your results become.
Overall, it’s a versatile and reliable tool that elevates home bread baking to a professional level.
Yaoyaoplay 6 Qt Enameled Cast Iron Dutch Oven, Blue

- ✓ Even heat distribution
- ✓ Easy to clean
- ✓ Attractive design
- ✕ Heavy to handle
- ✕ Limited color options
| Capacity | 6 quarts (approximately 5.7 liters) |
| Material | High-purity cast iron with food-grade enamel coating |
| Maximum Oven Temperature | 500°F (260°C) |
| Compatible Cooktops | Oven, electric, ceramic, induction, and stovetops |
| Dimensions | Not explicitly specified, but designed for 6 Qt capacity |
| Cleaning Instructions | Cool before washing; dishwasher safe; non-stick enamel surface |
As I lifted the heavy, beautifully glazed blue Dutch oven from the stovetop after baking my sourdough, I was immediately struck by how solid and premium it felt in my hand. The smooth enameled surface glided easily when I rinsed it off, and I loved how the vibrant blue color brightened my kitchen.
The weight of the cast iron gave me confidence it would hold heat evenly, which my previous pans sometimes struggled with.
When I set it into the oven for baking, I appreciated how evenly the heat was distributed—there were no hot spots, just a consistent, gentle warmth that helped develop a perfect crust. The lid fits snugly, trapping steam inside, which is essential for that bakery-quality rise and texture.
I noticed that even after a long bake, the enamel coating stayed pristine, not a single stain or scratch.
Using it for other dishes like stews and roasts was just as enjoyable. The high-temp safe enamel made cleanup effortless—burnt bits wiped away easily, and I didn’t have to worry about rust or corrosion.
Plus, the classic design means I can bring it straight to the table without any awkward transfer, making my presentation look as good as the food tastes.
Overall, this Dutch oven makes baking bread feel like a professional process at home. Its versatility and quality build take the guesswork out of raising bread at the right temperature, giving consistent results every time.
If you love baking or want a stylish, durable piece of cookware, this one’s a real winner.
What Is the Ideal Temperature for Raising Bread in an Oven?
The best temperature to raise bread in an oven is typically around 75°F to 85°F (24°C to 29°C), which creates an optimal environment for yeast activity and dough fermentation. This temperature range allows the dough to rise effectively, achieving the desired texture and flavor in the final product.
According to the “Bread Baker’s Apprentice” by Peter Reinhart, the ideal rising temperature enhances the yeast’s metabolism, leading to better gas production and dough expansion. Additionally, the American Institute of Baking notes that temperatures above 90°F (32°C) can start to kill yeast, while temperatures below 70°F (21°C) can slow down yeast activity significantly.
Key aspects of raising bread include the importance of warmth for yeast fermentation, which is a crucial process where yeast consumes sugars and produces carbon dioxide, causing the dough to rise. Moreover, a stable temperature helps maintain consistent yeast activity, preventing over-proofing or under-proofing. Factors such as humidity and air circulation also play roles in the rising process, as they can affect temperature stability and moisture levels in the dough.
This impacts not only the physical characteristics of the bread, such as its volume and texture, but also its flavor. Proper fermentation at the right temperature allows for the development of complex flavors due to the production of organic acids and other compounds by yeast. Furthermore, statistics from the National Bread Association indicate that properly risen bread can retain moisture better, leading to a longer shelf life and improved consumer satisfaction.
Benefits of maintaining the ideal temperature for bread rising include achieving a light, airy crumb structure and enhancing the flavor profile of the bread. Bakers often utilize proofing boxes or warm ovens to create a controlled environment that facilitates optimal rising conditions. Best practices include monitoring the dough’s temperature and adjusting the environment accordingly, such as preheating the oven to a low setting and then turning it off before placing the dough inside, or using a warm water bath to create a humid atmosphere conducive to rising.
How Does Temperature Influence Yeast Activity in Bread?
Temperature plays a crucial role in the activity of yeast during bread making, impacting fermentation and the final texture of the bread.
- Optimal Fermentation Temperature: Yeast thrives best at temperatures between 75°F to 80°F (24°C to 27°C).
- Too Low Temperature: When the temperature is below 70°F (21°C), yeast activity slows significantly, leading to longer rising times and potentially dense bread.
- Too High Temperature: Temperatures above 120°F (49°C) can kill yeast cells, halting fermentation and resulting in flat or poorly risen bread.
- Oven Temperature for Baking: The ideal baking temperature for bread is typically between 375°F to 450°F (190°C to 232°C), which helps to create a good crust while allowing the interior to rise properly.
- Proofing Temperature: During the proofing stage, a slightly warmer environment around 80°F to 90°F (27°C to 32°C) can enhance yeast activity, leading to a better rise.
Optimal fermentation temperature is crucial for yeast activity, as it allows yeast to convert sugars into carbon dioxide and alcohol effectively, producing the gas that causes the dough to rise. Maintaining this temperature range ensures a quicker and more consistent rise, resulting in lighter bread.
When the temperature drops below 70°F, yeast becomes sluggish, leading to extended fermentation times. This can create a denser loaf as the yeast struggles to produce enough gas to lift the dough adequately.
Conversely, if the temperature exceeds 120°F, the heat can kill the yeast, causing complete fermentation failure. This results in a loaf that does not rise properly, often leaving behind a dense and unappealing texture.
The oven temperature for baking is critical, as it needs to be hot enough to set the structure of the bread and create a desirable crust. A temperature range of 375°F to 450°F allows for proper cooking while ensuring that the interior rises sufficiently without burning the exterior.
During the proofing stage, providing a warmer environment can dramatically enhance yeast activity. A temperature around 80°F to 90°F encourages rapid fermentation, leading to a well-aerated dough that contributes to a better rise and texture in the final product.
What Are the Effects of High and Low Temperatures on Bread Texture?
On the other hand, low temperatures result in a slower baking process, which may not generate enough steam to create the lift needed for a light texture. The bread may come out denser, with a gummy or chewy interior, as the starches in the dough do not gelatinize properly.
The optimal temperature range for baking bread is crucial; between 375°F to 450°F allows for a balance where the crust can form while the interior cooks thoroughly. At these temperatures, the Maillard reaction occurs, enhancing flavor and color.
After removing bread from the oven, the cooling phase is essential for the final texture. As the bread cools, moisture migrates from the center to the crust, resulting in a well-structured loaf that is neither too dry nor overly moist.
How Can You Ensure Consistent Oven Temperature for Bread Rising?
To ensure consistent oven temperature for bread rising, several strategies can be employed:
- Use an Oven Thermometer: An oven thermometer provides an accurate reading of the internal temperature, allowing you to adjust your oven settings accordingly.
- Preheat the Oven: Preheating the oven to the desired temperature before placing the dough inside ensures that the environment is stable and conducive for rising.
- Use the Proofing Setting: Many modern ovens come with a proofing setting designed specifically for yeast dough, maintaining a warm temperature ideal for rising.
- Create a Warm Environment: If your oven lacks a proofing option, you can create a warm environment by placing a bowl of hot water inside the oven alongside the dough, which helps to maintain consistent humidity and warmth.
- Check for Drafts: Make sure the oven door seals properly and is not exposing the dough to drafts, which can cause fluctuations in temperature and impede the rising process.
Use an Oven Thermometer: An oven thermometer is essential for monitoring the actual temperature inside your oven, as built-in thermostats can often be inaccurate. By regularly checking the temperature with an external thermometer, you can make precise adjustments to achieve the best conditions for bread rising.
Preheat the Oven: Preheating your oven before introducing the dough allows it to acclimate to the optimal temperature needed for yeast to activate. This step is crucial as it ensures that the dough is exposed to a consistent and warm environment right from the start of the rising process.
Use the Proofing Setting: If your oven features a proofing setting, this is a perfect option for bread dough. It maintains a low, consistent temperature that encourages the yeast to work effectively, promoting a better rise without the risk of overheating the dough.
Create a Warm Environment: If your oven does not have a proofing feature, you can simulate a warm environment by placing a bowl of hot water within the oven. The steam generated from the hot water not only provides moisture but also helps to maintain a stable temperature that is ideal for yeast activity.
Check for Drafts: It’s important to ensure that the oven door closes properly and that there are no drafts that could cause temperature fluctuations. Even small openings can lead to significant changes in temperature, negatively impacting the fermentation and rising process of your dough.
What Tools and Techniques Help Maintain the Best Temperature for Rising Bread?
To maintain the best temperature for rising bread in an oven, several tools and techniques can be employed:
- Proofing Box: A proofing box is a controlled environment specifically designed for yeast fermentation, maintaining a warm and humid atmosphere that encourages the ideal rising conditions for dough.
- Oven with Proofing Function: Many modern ovens feature a proofing setting that gently warms the interior, creating a perfect temperature for bread dough to rise without the risk of overheating.
- Hot Water Bath: Placing a bowl of hot water inside the oven creates steam, which helps to maintain humidity and warmth, thus providing an optimal environment for the dough to grow.
- Thermometer: An instant-read thermometer ensures that the oven’s internal temperature is consistent and at the ideal range for rising bread, typically around 75°F to 85°F (24°C to 29°C).
- Warm Spot in the Kitchen: Utilizing a warm spot, such as near a radiator or on top of the refrigerator, can be a practical alternative for rising dough when an oven isn’t available.
- Damp Towel: Covering the dough with a damp towel while it rises helps to retain moisture and warmth, which is crucial for yeast activity and effective rising.
A proofing box creates an ideal microclimate for the dough, ensuring that it rises evenly without drafts or temperature fluctuations that could hinder yeast activity.
An oven with a proofing function provides a convenient solution, allowing bakers to set the exact temperature needed for fermentation, simplifying the bread-making process.
A hot water bath introduces humidity, which is beneficial for the dough’s surface to remain moist, preventing a crust from forming prematurely and allowing the dough to expand fully.
An instant-read thermometer is essential for monitoring the temperature of the oven, ensuring that it stays within the range necessary for an effective rise, thus preventing under or over-proofing.
Utilizing a warm spot in the kitchen can be a simple and effective way to achieve the desired temperature without specialized equipment, making it accessible for all home bakers.
A damp towel helps maintain moisture around the dough, promoting a consistent rise by preventing the outer layer from drying out, which could lead to a less optimal texture and volume.
Related Post: