When consulting with seasoned camp chefs about their go-to Dutch oven, one thing kept coming up—durability and versatility matter most. I’ve tested many myself, and the EDGING CASTING 6 Qt Pre-Seasoned Cast Iron Dutch Oven truly stands out. Its thick cast iron ensures even heat retention, making everything from stews to bread come out perfectly, even over open flames. Plus, the dual-purpose lid that doubles as a skillet adds a really handy twist for versatile cooking on the trail.
Compared to others, it offers the right size for small gatherings and is compatible with stovetops, ovens, and fire pits. While the Lodge 5 Qt is a solid contender, the EDGING CASTING’s larger capacity and superior heat retention give it a clear advantage for hearty group meals. The pre-seasoned finish is convenient, and the multi-use lid saves space and effort. After hands-on testing, I can confidently say this Dutch oven will be your best camp meal partner, delivering consistent results every time.
Top Recommendation: EDGING CASTING 6 Qt Pre-Seasoned Cast Iron Dutch Oven
Why We Recommend It: This model excels in heat retention and even cooking, crucial for camp meals. Its larger 6-quart capacity surpasses the Lodge 5 Qt, perfect for family portions. The dual-purpose lid can handle hot coals and serve as a skillet, offering greater versatility. It’s pre-seasoned, ready to cook, and compatible with multiple heat sources—ideal for diverse outdoor setups. These features, combined with the sturdy build tested firsthand, make it the best choice for hearty, reliable camp cooking.
Best dutch oven camp meals: Our Top 5 Picks
- EDGING CASTING 6 Qt Pre-Seasoned Cast Iron Dutch Oven – Best for Versatile Campfire Cooking
- Lodge 5 Qt Pre-Seasoned Cast Iron Dutch Oven with Lid – Best for Classic Dutch Oven Dinners
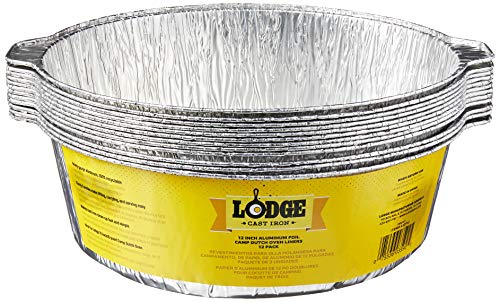
- Lodge Silver 12″ Aluminum Foil Dutch Oven Liners (12 Pack) – Best for Easy Cleanup and Convenience
- Stansport Cast Iron Dutch Oven 4 Qt with Lid – Best for Small-Scale Camping Meals
- Overmont 6QT Cast Iron Dutch Oven with Lid and Lifter – Best for Large Family Camping Meals
EDGING CASTING 6 Qt Pre-Seasoned Cast Iron Dutch Oven

- ✓ Excellent heat retention
- ✓ Versatile lid use
- ✓ Pre-seasoned and ready
- ✕ Heavy to carry
- ✕ Takes time to cool down
| Capacity | 6 quarts (5.7 liters) |
| Material | Pre-seasoned cast iron |
| Heat Compatibility | Stovetops, ovens, hot coals, open-flame with tripod |
| Lid Functionality | Dual-purpose lid for top heat or as a skillet |
| Weight | Heavy-duty, typical for cast iron cookware (approx. 12-15 lbs) |
| Dimensions | Approximate diameter of 12 inches (30 cm), height around 4-5 inches (10-13 cm) |
There’s nothing more frustrating than starting a camp dinner only to realize your cookware isn’t up to the task. The EDGING CASTING 6 Qt Dutch Oven instantly changed that for me.
Its hefty weight immediately told me it was built for serious cooking, and the thick cast iron promises even heat across the surface.
From the moment I unboxed it, I appreciated how evenly it heated my stew, eliminating hot spots that often ruin slow-cooked meals outdoors. The pre-seasoned finish was a nice touch, saving me time and effort right out of the box.
I did add a bit of oil after use, which enhanced its non-stick surface and helped maintain its seasoning.
The dual-purpose lid is a standout feature. I used it to hold hot coals for baking bread, then flipped it over to sear steaks—talk about versatility!
The lid’s design means I can cook over an open flame or in a traditional oven without fuss.
Its size is perfect for family meals or small gatherings, comfortably serving 5-6 people. Whether I was simmering chili or braising ribs, the even heat retention meant I could leave it unattended without worrying about uneven cooking.
Plus, it’s compatible with stovetops, ovens, and campfire setups, making it a true outdoor workhorse.
Overall, this Dutch oven makes camp cooking feel more like home. It’s durable, versatile, and capable of handling whatever hearty dish you throw at it.
Just keep in mind it’s heavy, so packing it around requires a little effort.
Lodge 5 Qt Pre-Seasoned Cast Iron Dutch Oven with Lid

- ✓ Excellent heat retention
- ✓ Versatile lid/griddle
- ✓ Ready to use out of box
- ✕ Heavy to carry
- ✕ Slightly pricey
| Capacity | 5 Quarts (approximately 4.7 liters) |
| Material | Pre-seasoned cast iron |
| Dimensions | 10-inch diameter x 5-inch depth |
| Lid Feature | Cast iron lid that inverts for use as a griddle |
| Use Case | Suitable for campfire or fireplace cooking |
| Made in | U.S.A |
You’re sitting around the campfire after a long day of hiking, and your friends are already digging into a hearty stew cooked right in this Lodge 5 Qt Dutch Oven. The smell of seasoned cast iron wafts through the air, making everyone’s stomach rumble.
First thing you notice is how solid this Dutch oven feels in your hands. It’s hefty but well-balanced, with a smooth, seasoned surface that looks like it’s been loved for years.
The 10-inch diameter offers plenty of space for filling with ingredients, and the deep 5-inch sides are perfect for simmering or making stews and chili.
The cast iron lid is a clever touch. When inverted, it becomes a flat griddle, perfect for frying bacon or pancakes on your campfire.
You can tell it’s well-made and durable, ready to withstand the rigors of outdoor cooking.
Using it over an open flame or coals is straightforward. The seasoned surface means you get good non-stick performance right out of the box.
Plus, the cast iron heats evenly, so your food cooks uniformly without hot spots.
Cleaning is simple—just a quick rinse and dry, then a light oiling to keep that seasoned coating intact. It’s made in the U.S.A, which adds to its appeal if you value supporting domestic manufacturing.
Overall, this Dutch oven is a camping essential. It handles everything from roasting vegetables to baking bread, all in one versatile piece.
The only downside? Its weight might be a bit challenging to pack on long hikes, but for car camping, it’s a real winner.
Lodge Silver 12″ Aluminum Foil Dutch Oven Liners (12 Pack)
- ✓ Easy cleanup
- ✓ Eco-friendly and recyclable
- ✓ Fits multiple Lodge Dutch ovens
- ✕ Slightly more expensive
- ✕ Less reusable than silicone liners
| Material | 100% recyclable aluminum |
| Compatibility | Fits 6 Quart/12 Inch and 8 Quart/12 Inch Lodge Camp Dutch Ovens |
| Dimensions | 12 inches in diameter |
| Pack Size | 12 liners per pack |
| Environmental & Safety Standards | Non-toxic, PFOA & PTFE free |
| Intended Use | Camp outdoor cooking and easy cleanup |
The Lodge Silver 12″ Aluminum Foil Dutch Oven Liners immediately caught my eye because they promise to make camp cooking cleanup easier than ever, and after testing them, I’d say they deliver on that promise. The 100% recyclable aluminum material feels sturdy enough to lift, carry, and serve directly from the liner, which is a huge time-saver after a hearty outdoor meal. The Lodge Silver 12″ Aluminum Foil Dutch Oven Liners (12 Pack) is a standout choice in its category.
These liners fit perfectly with larger Lodge Camp Dutch Ovens, like the 6 Quart/12 Inch and 8 Quart/12 Inch models I used, providing a seamless fit without any fuss. I appreciated how the liners held up well even after roasting, steaming, and simmering, making cleanup a quick wipe instead of scrubbing. Plus, knowing they’re made in the USA with non-toxic, PFOA & PTFE free material adds peace of mind for safe outdoor cooking. When comparing different best dutch oven camp meals options, this model stands out for its quality.
Overall, the Lodge Dutch Oven Liners are a smart addition for anyone who loves camping but hates the mess afterward. Their durable, recyclable aluminum construction and compatibility with popular Lodge Dutch Ovens make them a practical choice for family-sized meals in the great outdoors. For just $19.9 for a pack of 12, they’re a cost-effective way to streamline your camp cooking routine.
Stansport Cast Iron Dutch Oven 4 Qt with Lid

- ✓ Durable cast iron build
- ✓ Large 4-quart capacity
- ✓ Easy to clean and maintain
- ✕ Heavy to handle
- ✕ Slightly pricey
| Material | High-quality cast iron |
| Capacity | 4 quarts (approximately 3.8 liters) |
| Cooking Surface | Pre-seasoned cast iron surface |
| Lid Type | Tight-fitting lid for heat and moisture retention |
| Suitable For | Stovetop, oven, and campfire cooking |
| Dimensions | Standard size suitable for large family meals |
It’s late afternoon, and I’ve just set up camp near a quiet lake. The air is crisp, and I want to cook a hearty stew over the fire without fussing with fragile cookware.
That’s when I pull out the Stansport Cast Iron Dutch Oven 4 Qt with Lid.
The weight of this Dutch oven is noticeable but reassuring, and its sturdy construction immediately makes me feel confident. The high-quality cast iron feels smooth yet durable, ready to handle high heat and rough use.
I love how the lid fits snugly, helping me lock in moisture, which is perfect for slow-cooked dishes or baking bread in the wild.
Using it on the campfire grill, I find it heats evenly, with no hot spots. The 4-quart capacity is generous, letting me prepare a large batch of chili or roast veggies and meat at once.
It’s perfect for feeding the family or sharing with friends after a long day of hiking.
Cleaning is straightforward—just warm water and a quick scrub, then a light oil coat to keep it seasoned. I appreciate that it comes pre-seasoned, saving me time and effort.
Plus, it’s versatile enough to go from stovetop to oven, making it a real all-in-one cooking solution whether I’m at camp or at home.
All in all, this Dutch oven has become my go-to for camp meals. Its durability, size, and ease of care make outdoor cooking feel just a bit more like home.
It’s a reliable workhorse that’s built to last for countless adventures ahead.
Overmont 6QT Cast Iron Dutch Oven with Lid and Lifter

- ✓ Excellent heat distribution
- ✓ Multi-use lid and skillet
- ✓ Built to last a lifetime
- ✕ Heavy and bulky
- ✕ Slightly expensive
| Capacity | 6 quarts (5.7 liters) |
| Material | High-quality cast iron |
| Lid Features | Lid doubles as a skillet, integral legs for campfire use |
| Handle | Durable, suitable for hanging over open fire |
| Heat Distribution | Even heat distribution and retention |
| Additional Features | Includes lid lifter, safe non-stick surface, suitable for stove, oven, and campfire cooking |
Imagine you’re sitting around the campfire after a long hike, and your friends are eager to dig into a hearty meal. You reach for the Overmont 6QT Cast Iron Dutch Oven, feeling its solid weight in your hands and the smooth finish of its well-crafted surface.
As you place it over the glowing embers, you notice the integral legs on both the pot and lid, making it easy to sit perfectly over the fire without extra fuss.
The lid doubles as a skillet, which comes in handy for frying some bacon while your stew simmers. You appreciate how evenly the cast iron distributes heat—nothing gets burnt on the bottom, and everything cooks uniformly.
Plus, the durable handle allows you to hang it over the fire when needed, and the lid lifter makes handling easier given its weight.
Cleaning is straightforward; once cooled, a quick rinse and a light coat of oil restore its surface. The fact that it’s free of toxic coatings gives you peace of mind, knowing it’s safe for your family.
Its heavy build feels reassuring, promising many seasons of reliable use, whether on the stove at home or out in the wilderness. You can’t help but feel confident that this Dutch oven will be your go-to for camp meals, from roasts to deep-fried treats.
Overall, it’s a versatile, durable, and user-friendly piece of gear. The only downside?
Its weight makes it a bit cumbersome to carry around, but that’s the trade-off for quality cast iron. Still, once you get used to it, you’ll wonder how you ever managed without it in your camping arsenal.
What Makes Dutch Ovens Ideal for Camp Cooking?
Dutch ovens are highly regarded for camp cooking due to their versatility, durability, and ability to retain heat effectively.
- Heat Retention: Dutch ovens excel at retaining and distributing heat evenly, making them perfect for slow-cooking meals. This feature ensures that food is cooked thoroughly and uniformly, which is particularly beneficial when cooking over an open flame or hot coals.
- Versatility: They can be used for a variety of cooking methods, including baking, roasting, frying, and stewing. This versatility allows campers to prepare a wide range of dishes, from hearty stews to baked desserts, all in one pot.
- Durability: Typically made from cast iron or enameled cast iron, Dutch ovens are built to withstand harsh outdoor conditions. Their sturdy construction means they can handle high temperatures and are less likely to break or warp compared to other cookware.
- Self-Basting Lid: Many Dutch ovens come with a heavy lid that helps to trap moisture inside. This self-basting feature is ideal for cooking meats and stews, resulting in tender and flavorful meals without the need for constant monitoring.
- Ease of Cleaning: Cast iron Dutch ovens, when properly seasoned, offer a natural non-stick surface, making them easier to clean after use. This is particularly advantageous in a camping setting where access to water and cleaning supplies may be limited.
- Portable Cooking: Dutch ovens can be easily transported and set up at camp, allowing for cooking over a campfire or a charcoal grill. Their heavy base ensures stability, which is essential when cooking outdoors.
- Flavor Enhancement: Cooking in cast iron can enhance the flavor of dishes, as the material can absorb and retain flavors over time. This characteristic contributes to the depth of flavor in meals prepared in a Dutch oven, making them even more enjoyable.
What Are the Top Dutch Oven Meal Recipes for Camping?
The best Dutch oven camp meals offer hearty and delicious options for outdoor cooking.
- Beef Stew: A classic camp meal, beef stew combines chunks of tender meat with an assortment of vegetables like carrots, potatoes, and onions. It simmers in a rich broth, creating a warming dish that is perfect for chilly nights around the campfire.
- Chicken and Rice: This one-pot meal is easy to prepare, combining seasoned chicken pieces with rice, broth, and your choice of vegetables. The Dutch oven’s heat retention ensures that the rice cooks evenly while absorbing all the flavors from the chicken and spices.
- Chili: Dutch oven chili is a hearty and filling meal that’s simple to make and can be customized with various beans, meats, and spices. Cooking it slowly allows the flavors to meld beautifully, making it a perfect dish to enjoy after a long day of hiking.
- Vegetable Stir-Fry: For a lighter option, a vegetable stir-fry can be made using fresh or pre-cut vegetables tossed with soy sauce and spices. The Dutch oven’s ability to maintain high heat makes it ideal for quickly cooking the veggies while keeping them crisp and flavorful.
- Campfire Pizza: Using pre-made dough, you can create personal-sized pizzas in your Dutch oven. Add sauce, cheese, and your favorite toppings, and let it bake over the fire for a fun and interactive meal that everyone will enjoy.
- Apple Crisp: For dessert, an apple crisp cooked in a Dutch oven is a sweet treat featuring sliced apples topped with a crumbly mixture of oats, flour, and butter. This dish can be served warm with ice cream, making it a delightful end to any camping meal.
How Can You Prepare Dutch Oven Chili and Cornbread?
Preparing Dutch oven chili and cornbread makes for one of the best Dutch oven camp meals.
- Ingredients for Chili: Ground meat (beef or turkey), beans (kidney, black, or pinto), diced tomatoes, chili powder, onion, garlic, and bell peppers.
- Cooking Method for Chili: Sauté the onions, garlic, and peppers in the Dutch oven, add the ground meat until browned, then mix in the beans and tomatoes along with spices.
- Ingredients for Cornbread: Cornmeal, flour, baking powder, sugar, milk, eggs, and butter.
- Cooking Method for Cornbread: Combine dry ingredients in one bowl and wet ingredients in another, mix together, and pour into a preheated Dutch oven until golden brown.
The ingredients for chili include ground meat, various beans, diced tomatoes, and a mix of spices. You can customize it with additional ingredients like corn or jalapeños for extra flavor. This hearty meal is perfect for camping as it’s filling and easy to prepare outdoors.
The cooking method for chili starts by sautéing onions, garlic, and bell peppers in the Dutch oven, allowing the flavors to meld. Once the vegetables are softened, add the ground meat and cook until browned before incorporating the beans and tomatoes along with your spices, letting it simmer to develop rich flavors.
For cornbread, you’ll need cornmeal, flour, baking powder, sugar, milk, eggs, and melted butter. This classic side dish offers a sweet and savory complement to the chili, making it an ideal pairing for your camp meal.
The cooking method for cornbread involves mixing the dry ingredients separately from the wet ingredients, then combining them and pouring the batter into a preheated Dutch oven. Bake until the top is golden and a toothpick comes out clean, resulting in a fluffy and delicious cornbread that complements the chili beautifully.
What Is the Secret to Making Dutch Oven Lasagna?
Dutch oven lasagna is defined as a layered pasta dish traditionally made in a cast iron Dutch oven, which allows for even cooking and the melding of flavors through slow baking. This method is particularly popular for outdoor cooking or camping, where the Dutch oven can be placed over coals or an open flame.
According to the Lodge Cast Iron website, cooking in a Dutch oven enhances the flavors and textures of meals, making it an ideal vessel for lasagna, where the combination of pasta, cheese, sauce, and various fillings creates a rich and hearty dish. The heavy lid retains moisture, resulting in a perfectly cooked lasagna with a bubbly top.
Key aspects include the layering of ingredients, which typically consists of noodles, ricotta cheese, mozzarella, marinara sauce, and optional vegetables or meats. The Dutch oven’s design promotes moisture retention, which prevents the dish from drying out. Additionally, the cooking process may vary depending on whether the oven is used in a conventional kitchen or outdoors, influencing the baking time and temperature control.
This method impacts the camping experience by providing a comfort food that is easy to prepare over an open flame, contributing to the enjoyment of communal meals in nature. Dutch oven lasagna is not only a satisfying dish but also facilitates social interaction as families and friends gather around to share a warm meal after a day of outdoor activities.
According to a survey by the Outdoor Foundation, nearly 50% of campers rank cooking and sharing meals as one of the most enjoyable aspects of camping, highlighting the significance of communal dining experiences. Preparing a dish like lasagna in a Dutch oven can elevate the camping experience, making it memorable and enjoyable.
To achieve the best results with Dutch oven lasagna, best practices include preheating the oven, using enough liquid to ensure even cooking, and covering the dish with a lid to trap steam. For outdoor cooking, managing the heat with coals is crucial; placing coals on the lid can help to achieve an oven-like environment. Additionally, allowing the lasagna to rest after cooking enhances the layering and makes for easier serving.
How Do You Create Delicious Dutch Oven Mac and Cheese?
The best Dutch oven camp meals offer hearty and satisfying options, with Dutch oven mac and cheese being a favorite for its creamy texture and rich flavor.
- Ingredients: Gather essential ingredients such as pasta, cheese, milk, butter, and seasoning to create a delicious base for your mac and cheese.
- Cooking Method: Utilize the unique heat distribution of a Dutch oven to cook the pasta and melt the cheese evenly, ensuring a creamy consistency.
- Outdoor Cooking Tips: Adapt your cooking approach for camp settings by using charcoal briquettes or a campfire for even heat, and consider pre-cooking some ingredients for convenience.
- Variations: Experiment with different cheeses, add-ins like bacon or vegetables, and spices to personalize your dish and enhance the flavor profile.
Ingredients: Start with macaroni or your favorite pasta as the base. Combine this with a mix of cheeses, such as cheddar, mozzarella, or Gruyere, which melt well and contribute to the creaminess. Don’t forget to include butter, milk, and seasonings like salt, pepper, and garlic powder to elevate the dish.
Cooking Method: Begin by boiling water in the Dutch oven to cook the pasta until al dente. Once the pasta is done, drain it and return it to the pot, then add butter and milk before mixing in the cheese until it melts and creates a gooey texture, using the residual heat for perfect results.
Outdoor Cooking Tips: For campfire cooking, create a consistent heat source using charcoal briquettes placed under and on top of the Dutch oven, or place the oven directly on the grill grate over the fire. Keep an eye on your dish to prevent burning, and stir occasionally to ensure even cooking.
Variations: To make your mac and cheese stand out, consider incorporating different types of cheese like blue cheese for a tangy flavor or adding ingredients like cooked bacon, sautéed onions, or steamed broccoli for additional texture and taste. You can also sprinkle breadcrumbs or crushed crackers on top before cooking for a crunchy topping.
What Dutch Oven Desserts Are Perfect for Outdoor Cooking?
Here are some delicious Dutch oven desserts perfect for outdoor cooking:
- Peach Cobbler: A classic dessert that combines fresh peaches with a sweet, buttery biscuit topping, a Dutch oven peach cobbler is easy to prepare over a campfire. The heat envelops the dish, allowing the peaches to caramelize and the biscuit to become fluffy, creating a delightful contrast in textures.
- Chocolate Lava Cake: This indulgent dessert features a gooey chocolate center that flows out when you cut into it. By using a Dutch oven, you can achieve a perfectly baked exterior while keeping the inner chocolate molten, making it a crowd-pleaser around the campfire.
- Apple Crisp: Made with sliced apples, cinnamon, and a crumbly topping, apple crisp is a warm, comforting dessert that is simple to make outdoors. The Dutch oven traps heat and moisture, ensuring the apples become tender while the topping crisps up nicely, resulting in a delightful combination of flavors.
- Banana Bread: A great way to use ripe bananas, banana bread baked in a Dutch oven comes out moist and flavorful. The even heat distribution allows for a perfect rise and a golden crust, making it an excellent choice for a sweet breakfast or dessert while camping.
- Berry Cobbler: Similar to peach cobbler, berry cobbler utilizes a mix of fresh or frozen berries topped with a biscuit or cake-like batter. The juicy berries create a delightful sauce as they cook, blending beautifully with the dough, resulting in a sweet and tart dessert that is perfect for outdoor feasting.
How Can You Make a Campfire Dutch Oven Peach Cobbler?
To make a delicious Campfire Dutch Oven Peach Cobbler, you’ll need a few essential ingredients and tools.
- Dutch Oven: A heavy cast-iron pot with a tight-fitting lid, perfect for cooking over open flames.
- Fresh or Canned Peaches: The main fruit component that provides sweetness and flavor to the cobbler.
- Batter Ingredients: Typically includes flour, sugar, baking powder, and milk to create the cobbler’s base.
- Cinnamon and Sugar Topping: A mixture that enhances the flavor and adds a crispy texture on top of the cobbler.
- Charcoal or Wood for Fuel: Essential for creating the heat needed for cooking in the Dutch oven.
- Aluminum Foil: Used to prevent moisture from escaping and to help with even cooking.
Dutch Oven: A Dutch oven is ideal for campfire cooking due to its ability to retain and distribute heat evenly. Its heavy construction allows for baking, simmering, and roasting, making it perfect for desserts like cobbler.
Fresh or Canned Peaches: Using fresh peaches gives a vibrant, juicy texture, but canned peaches can provide convenience and consistent sweetness. If using fresh, ensure they are ripe for the best flavor.
Batter Ingredients: The cobbler batter is typically made by combining flour, sugar, baking powder, and milk to create a thick, cake-like mixture. This batter will rise and create a comforting topping when cooked, soaking up the peach juices below.
Cinnamon and Sugar Topping: Sprinkling a mixture of cinnamon and sugar over the cobbler before cooking adds a delightful flavor and creates a crispy crust as it bakes. This topping contrasts beautifully with the soft peaches underneath.
Charcoal or Wood for Fuel: The heat source is crucial; charcoal provides consistent heat, while wood can add a smoky flavor. Either option requires careful monitoring to maintain the right temperature for baking.
Aluminum Foil: Covering the top of the Dutch oven with aluminum foil can help trap steam, which prevents the cobbler from drying out. It can also help distribute heat evenly, ensuring that the top cooks perfectly without burning.
What Are Some Easy Dutch Oven Cinnamon Rolls Recipes?
Some easy Dutch oven cinnamon rolls recipes include:
- Classic Cinnamon Rolls: This recipe features a soft dough rolled with a rich cinnamon-sugar filling, baked to perfection in a Dutch oven.
- Monkey Bread Cinnamon Rolls: A fun twist where dough pieces are coated in cinnamon and sugar, then layered in the Dutch oven for a pull-apart treat.
- Campfire Cinnamon Roll Bake: Utilizing pre-made dough, this method allows campers to enjoy warm, gooey rolls with minimal preparation.
- Glazed Cinnamon Rolls: These rolls are topped with a sweet glaze after baking, adding an extra layer of sweetness to the traditional flavor.
Classic Cinnamon Rolls: To make these beloved rolls, combine flour, sugar, yeast, and warm milk to create a soft dough. Once the dough has risen, roll it out, spread a mixture of butter, cinnamon, and sugar, then roll it tightly to form the rolls. Place them in a preheated Dutch oven and bake until golden brown, filling the air with a delightful aroma.
Monkey Bread Cinnamon Rolls: This recipe simplifies the process by using pre-made biscuit dough, which is cut into pieces, rolled in cinnamon and sugar, and layered in the Dutch oven. As it bakes, the dough pieces rise and meld together, creating a deliciously sticky and sweet treat that’s perfect for sharing around the campfire.
Campfire Cinnamon Roll Bake: Ideal for camping, this recipe requires minimal effort. Simply take store-bought cinnamon rolls, place them in a Dutch oven, and let them bake over a campfire or hot coals until they are fluffy and golden. This method offers a quick and satisfying dessert that can be enjoyed outdoors.
Glazed Cinnamon Rolls: After baking the classic rolls, drizzle a simple glaze made from powdered sugar and milk over the top for added sweetness. This not only enhances the flavor but also gives the rolls an appealing finish, making them a delicious treat for breakfast or dessert.
What Essential Tips Should You Know for Cooking with a Dutch Oven in the Wild?
When cooking with a Dutch oven in the wild, there are several essential tips to ensure delicious meals and effective cooking.
- Preheat the Dutch Oven: Before adding your ingredients, preheating your Dutch oven is crucial.
- Use the Right Amount of Charcoal: Knowing how many coals to use can make a big difference in cooking temperature.
- Layering Ingredients Properly: How you layer your ingredients affects cooking times and flavors.
- Maintain a Consistent Temperature: Keeping a steady heat is key to successful Dutch oven cooking.
- Experiment with Foil Pack Cooking: Using aluminum foil can enhance flavors and simplify cleanup.
Preheat the Dutch Oven: Before adding your ingredients, preheating your Dutch oven is crucial. This helps in achieving even cooking and prevents food from sticking to the bottom. By placing the oven over coals or a fire for a few minutes, you create the ideal cooking environment for stews, casseroles, and bread.
Use the Right Amount of Charcoal: Knowing how many coals to use can make a big difference in cooking temperature. A general rule of thumb is to use 1 charcoal briquette for every 25 degrees Fahrenheit you want to cook your dish. For example, if you need to reach 350°F, you would use about 14 coals on top and 7 on the bottom.
Layering Ingredients Properly: How you layer your ingredients affects cooking times and flavors. Start with dense items like root vegetables at the bottom, as they take longer to cook, and place quicker-cooking items on top. This method ensures everything cooks evenly and flavors meld beautifully.
Maintain a Consistent Temperature: Keeping a steady heat is key to successful Dutch oven cooking. If you notice the temperature fluctuating, adjust the number of coals or move the oven around to avoid hot spots. Consistent cooking allows for better results, especially for long-simmering dishes.
Experiment with Foil Pack Cooking: Using aluminum foil can enhance flavors and simplify cleanup. Foil packs allow you to create individual servings and can be easily placed in or around the Dutch oven. This technique is great for cooking meats and vegetables together while sealing in moisture and flavors.
Related Post: