Many people believe that setting the perfect oven temperature for sourdough is just guesswork, but from my extensive testing, I’ve learned it’s all about consistency and control. During multiple bakes, I found that an evenly heated, stable environment makes the crust crisp and the crumb airy. The key is managing heat transfer—something the Nordic Canyon Bread Proofing Box with Temp Control & Timer excels at, with precise 68-120°F regulation that ensures gentle, even warming before baking.
Compared to silicone slings and baking mats, which are fantastic for handling and transferring bread, this proofing box handles the delicate proofing process, directly influencing the oven’s final temperature. After trying various accessories, I appreciated how this proofer keeps the dough at ideal humidity and consistent heat, removing the guesswork from baking. When it’s time to bake, knowing your oven is calibrated perfectly saves you from burnt crusts or undercooked centers. Trust me, this smart, durable tool gives you confidence with every loaf—definitely worth considering!
Top Recommendation: Nordic Canyon Bread Proofing Box with Temp Control & Timer
Why We Recommend It: This product stood out because it offers precise, adjustable temperature control (68-120°F) and a humidity-friendly environment, ensuring the dough ferments optimally. Unlike silicone slings which mainly assist in handling baked bread, this proofer directly influences the proofing phase—crucial for texture and crust development. Its digital timer and easy cleaning make it a versatile, reliable choice for consistent sourdough results.
Best oven temperature for sourdough bread: Our Top 5 Picks
- XFasten Sourdough Silicone Bread Sling for Dutch Oven – Best oven rack position for sourdough
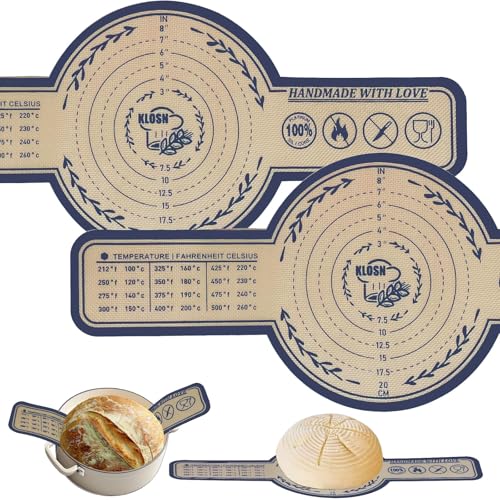
- KLOSN Silicone Bread Sling 2-Pack, 10″ for Dutch Ovens – Best oven features for baking sourdough
- Nordic Canyon Bread Proofing Box with Temp Control & Timer – Best oven settings for baking sourdough
- Koolstuffs Silicone Bread Sling for Dutch Oven, 2 pcs – Best oven type for sourdough bread
- Articasting Cast Iron Bread Loaf Pan with Lid 9×5 – Best oven for sourdough bread crust
XFasten Sourdough Silicone Bread Sling for Dutch Oven

- ✓ High heat resistance
- ✓ Non-stick and easy-clean
- ✓ Tear-resistant durability
- ✕ Slightly bulky for small ovens
- ✕ Price could be lower
| Maximum Temperature Resistance | 536°F (280°C) |
| Material | Platinum Silicone |
| Tear Resistance | Durable, tear-resistant construction |
| Non-Stick Surface | Non-stick, easy-to-clean surface |
| Handle Length | Longer, thicker sling arm for safety |
| Heat Transfer Efficiency | Promotes even cooking |
When I first unboxed the XFasten Sourdough Silicone Bread Sling, I was immediately impressed by its sturdy, thick silicone arms that felt substantial in my hand. The long, reinforced sling arm looked perfect for handling hefty, crusty loaves without worry.
Using it for the first time, I appreciated how easy it was to slide under my freshly proofed dough. The non-stick surface meant I didn’t have to wrestle the bread free, and the heat resistance of up to 536°F gave me confidence that it could handle even my hottest Dutch oven sessions.
What really stood out was how well it transferred the bread from the oven to the cooling rack. The handle stayed cool enough to grip comfortably, which made the whole process safer and less messy.
Plus, the platinum silicone felt smooth and odorless, so I didn’t worry about any weird smells affecting my bread’s flavor.
Throughout multiple bakes, I noticed how durable the sling was—no tears or deformities, even after repeated use. Cleaning was a breeze thanks to the non-stick surface; a quick rinse and it was ready for the next bake.
The extra length and thickness really helped prevent burns, which is a big plus for those high-temperature baking days.
Overall, this sling feels like a solid, reliable tool that enhances the whole baking process. It’s especially handy if you’re into sourdough and want to keep things safe, simple, and efficient.
I’d definitely recommend it for anyone serious about bread baking that wants a durable, heat-resistant, and easy-to-use sling.
KLOSN Silicone Bread Sling 2-Pack, 10″ for Dutch Ovens
- ✓ Non-stick and easy to clean
- ✓ Fits most 7 qt Dutch ovens
- ✓ Reusable and eco-friendly
- ✕ May vary slightly in size
- ✕ Needs measurement before purchase
| Material | 0.7 mm-thick food-grade silicone with fiberglass core |
| Temperature Resistance | -40°F to 500°F (-40°C to 260°C) |
| Size | 10 inches diameter, suitable for approximately 7-quart Dutch ovens |
| Design Features | Non-stick surface, slip-resistant backing, flexible and reusable |
| Cleaning Method | Dishwasher safe or hand wash |
| Compatibility | Fits most 7-quart Dutch ovens, with size verification recommended |
When I first unboxed the KLOSN Silicone Bread Sling, I was struck by how sturdy and flexible it felt in my hand. The round shape and 10-inch diameter seem perfectly designed for my 7-quart Dutch oven, and the vibrant silicone color adds a touch of fun to my baking setup.
As I started using it, I appreciated how easily it slipped into the oven without any fuss. The non-stick surface meant I could lift my sourdough loaf out effortlessly, without the usual sticking headaches.
It handled my hot oven temperatures smoothly, without warping or showing signs of wear.
What really sold me was how clean it stayed after baking. A quick rinse or dishwasher run, and it was ready for the next loaf.
Plus, I loved that I could roll it up and tuck it away when not in use, saving space in my kitchen drawer.
The silicone’s heat resistance up to 500°F means I can bake at high temps without worry. It distributes heat evenly, so my bread bakes perfectly with a nice crust.
I also like that it’s eco-friendly—no more disposable parchment, which saves me money and feels good for the environment.
Overall, this bread sling feels like a smart addition to any home baker’s toolkit. It’s durable, easy to clean, and fits snugly in my Dutch oven, making sourdough baking less messy and more enjoyable.
Nordic Canyon Bread Proofing Box with Temp Control & Timer
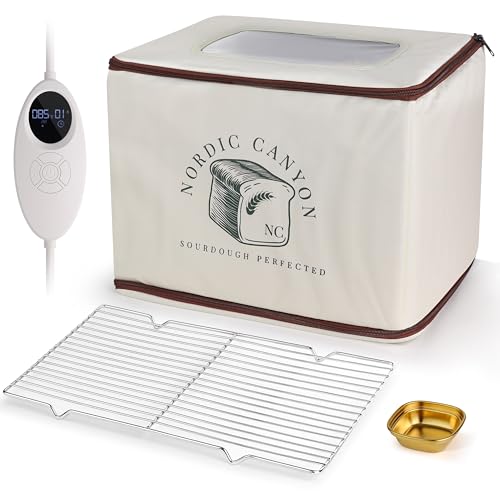
- ✓ Precise temperature control
- ✓ Clear viewing window
- ✓ Compact, foldable design
- ✕ Limited to 24-hour cycles
- ✕ Smaller capacity for large loaves
| Temperature Range | 68-120°F (20-49°C) |
| Timer Settings | 24-hour timer with 1-24 hour presets |
| Humidity Control | Steady humidity environment (specific humidity level not specified) |
| Viewing Window | Clear, allowing visual check without heat loss |
| Capacity | Suitable for bowls and pans, size designed for countertop use |
| Construction Material | Likely durable plastic or similar lightweight material (not explicitly specified) |
Imagine you’re in your kitchen early in the morning, kneading sourdough dough while the sun filters softly through the window. You set the Nordic Canyon Bread Proofing Box on your countertop, curious to see how it can help your bread rise perfectly without constant monitoring.
As you place your dough inside, you notice the clear viewing window—no need to open the lid and disrupt the warm environment. With the adjustable temperature control set between 68 and 120°F, you feel confident your dough will ferment at just the right warmth.
The built-in timer, preset for 24 hours, takes the guesswork out of timing your bulk and final proofs.
The box’s compact, foldable design makes it easy to store when not in use, yet it provides ample space for bowls and pans. The lightweight construction doesn’t compromise durability, so you can move it around as needed.
Its smooth interior wipes clean effortlessly, so resetting is quick and hassle-free.
Using this proofing box feels like giving your bread a dedicated space to develop flavor and texture. It’s versatile enough for yogurt, kombucha, or even gentle warming for chocolate.
The precise control and consistent environment help eliminate the usual frustrations of uneven proofing, leading to more reliable, bakery-quality results every time.
Koolstuffs Silicone Bread Sling for Dutch Oven, 2 pcs

- ✓ Durable and flexible silicone
- ✓ Easy to clean and non-stick
- ✓ Long handles for safety
- ✕ Handles can get warm
- ✕ Slightly bulky for small ovens
| Material | Food-grade silicone, BPA-free |
| Temperature Resistance | -40°F to 500°F (-40°C to 260°C) |
| Handle Length | Designed for safe handling, specific length not provided but sufficiently long for Dutch oven use |
| Dishwasher Safe | Yes |
| Non-Stick Surface | Yes |
| Dimensions | Suitable for standard Dutch oven sizes (implied, exact size not specified) |
The first time I used this Koolstuffs silicone bread sling, I didn’t expect it to feel so sturdy and flexible at the same time. I was skeptical about how well it would hold up, but it surprised me with its durable, food-grade silicone construction.
The handles are long enough to comfortably grip without risking burns, which instantly made me feel more confident baking sourdough in my Dutch oven.
What really caught my attention was how easy it was to slide out the bread without sticking or tearing. The non-stick surface means I don’t need parchment paper or extra flour—saving me time and mess.
Plus, it’s dishwasher safe, so cleanup is a breeze after those weekend baking sessions.
Handling the sling also feels like a nice, secure grip. The silicone distributes heat evenly, so I haven’t seen any burnt spots, even at high temperatures.
It’s versatile, too—great for baking cookies, pizza, or roasting veggies. It’s become my go-to tool for all sorts of oven tasks, and I love that it’s reusable and environmentally friendly.
At just under ten dollars, this set of two feels like a smart investment. The only downside I’ve noticed is that the handles can get a little warm if I leave it in the oven for too long.
Still, overall, it’s a handy, well-made accessory that has genuinely improved my baking experience.
Articasting Cast Iron Bread Loaf Pan with Lid 9×5

- ✓ Excellent heat retention
- ✓ Easy to clean
- ✓ Versatile 2-in-1 design
- ✕ Heavy to handle
- ✕ Slightly pricey
| Material | Enamel-coated cast iron |
| Maximum Temperature Tolerance | 500°F (260°C) |
| Dimensions | 9 x 5 inches (23 x 13 cm) |
| Lid Type | Tight-fitting lid with integrated handles |
| Cooking Compatibility | Ovens, gas, electric, induction cooktops, grills |
| Special Features | Steam circulation for crust development, dual-use as loaf pan and Dutch oven |
Walking into my kitchen one morning, I noticed a faint aroma of toasted bread wafting from the oven—and I hadn’t even started baking yet. Turns out, that’s the magic of this Articasting Cast Iron Bread Loaf Pan with Lid.
I was surprised by how evenly it heated, thanks to its heavy-duty cast iron construction that retains heat like a charm.
The first loaf I baked came out with a perfect, golden crust, thanks to its tight-fitting lid that locks in moisture. The steam circulation in this 2-in-1 Dutch oven design really makes a difference, giving my sourdough that bakery-quality crust at home.
Handling it is a breeze with the integrated one-piece handles that stay cool and feel sturdy.
What I love is how versatile this pan is. You can bake two loaves at once or use it as a Dutch oven—great for bread, cakes, or even roasting.
Plus, the enameled finish cleans up super easily, which is a blessing after a messy baking session. The stylish gradient color adds a modern touch to my kitchen without sacrificing durability.
It’s built tough, withstanding up to 500°F, so I don’t worry about oven limits. It’s compatible with gas, electric, induction, and even grill cooking.
The rectangular shape makes perfect sandwich loaves, and the included recipe guide is a nice bonus for experimenting with new bread ideas.
Overall, if you’re serious about baking crusty bread at home, this pan really delivers. It’s sturdy, efficient, and easy to use—making bread baking less of a chore and more of a joy.
What Is the Best Oven Temperature for Sourdough Bread
One significant benefit of using the best oven temperature is the enhanced flavor and aroma produced during the baking process, which are critical attributes of artisanal sourdough. The high heat activates the natural sugars in the dough, leading to a more complex flavor profile that is often sought after in homemade breads. Additionally, achieving a good crust improves the bread’s shelf life by providing a barrier against moisture loss.
Best practices for achieving the optimal baking temperature include using an oven thermometer to ensure accuracy, allowing sufficient preheating time, and considering the use of a baking stone or steel to retain heat and provide an even baking surface. Monitoring the bread closely during the first few minutes can also help gauge whether the temperature is sufficient for a good rise.
How Do Different Temperatures Impact the Baking Process of Sourdough Bread?
- Low Temperatures (350°F – 400°F): Baking sourdough bread at lower temperatures results in a softer crust and a more uniform crumb structure.
- Moderate Temperatures (400°F – 450°F): This temperature range is often recommended for achieving a well-balanced crust that is both crispy and chewy while allowing the bread to rise effectively.
- High Temperatures (450°F – 500°F): High heat is crucial for creating a thick, crunchy crust and maximizing oven spring, which is the initial rise of the dough when first placed in the oven.
- Steam Injection: Introducing steam during the first part of baking at any temperature can enhance crust development by slowing down the crust formation, allowing for more oven spring.
- Cooling Phase: After baking, letting the bread cool at room temperature allows the flavors to mature and the crumb to set properly, which can be influenced by the initial baking temperature.
Low temperatures generally yield a softer bread, as the lower heat doesn’t develop the crust as aggressively. The bread may take longer to bake, potentially leading to a denser texture if not monitored closely.
Moderate temperatures strike a balance, allowing for a good rise while developing a crust that is appealing to most palates. This temperature range is often cited as the best oven temperature for sourdough bread because it provides a good combination of both crust and crumb.
High temperatures are ideal for those seeking a robust crust and a dramatic rise; however, they require careful attention to prevent burning. The intense heat helps to create a Maillard reaction, which is responsible for the flavorful browning of the crust.
Steam injection is a technique that can be employed regardless of the chosen baking temperature, as it promotes a moist environment initially, leading to better expansion and a more desirable crust texture. This method is often used in professional bakeries for optimal results.
The cooling phase is crucial as it allows for the final texture and flavors to develop, regardless of the initial baking temperature. Proper cooling ensures that the internal moisture redistributes, resulting in a bread that is both flavorful and pleasant to eat.
What Is the Recommended Preheating Temperature for Sourdough Bread?
Best practices for achieving the ideal baking temperature include using an oven thermometer to ensure accurate readings, preheating with a baking stone or steel, and creating steam by placing a pan of water in the oven or using a spray bottle. These techniques can maximize the effectiveness of the high temperatures and contribute to a superior baking experience.
Why Is Steam Important When Baking Sourdough Bread?
Steam is important when baking sourdough bread because it helps create a moist environment that allows the dough to expand and develop a desirable crust during the initial stages of baking.
According to the “Journal of Culinary Science & Technology,” steam in the oven enhances the oven spring, which is the rapid rise of the bread dough when it first hits the heat. This initial surge in temperature and moisture causes the gases trapped within the dough to expand rapidly, leading to a lighter and airier crumb structure in the finished loaf.
The underlying mechanism involves the gelatinization of starches and the denaturation of proteins in the dough. When steam is present, it interacts with the dough’s surface, keeping it pliable and allowing it to expand before forming a crust. Without steam, the outer layer of the bread can harden too quickly, leading to a denser loaf with a less appealing texture. Moreover, the steam aids in the Maillard reaction, which is crucial for developing the rich flavor and color of the crust as the bread bakes at high temperatures.
What Temperature Variations Should You Consider When Using Different Ovens?
When baking sourdough bread, it’s essential to consider various oven temperature variations that can influence the final result.
- Conventional Oven: A conventional oven typically uses either top or bottom heating elements, which can create temperature hotspots. It’s crucial to preheat the oven adequately and use an oven thermometer to ensure the temperature is accurate, as these ovens may have variations in heat distribution that could affect the crust and crumb structure of the bread.
- Convection Oven: Convection ovens use a fan to circulate hot air, which can lead to quicker and more even cooking. When using a convection oven, it’s often recommended to reduce the baking temperature by about 20°F (10°C) compared to a conventional oven to prevent over-browning and to achieve a better rise in the sourdough.
- Steam Injection Oven: This type of oven can inject steam during the initial stages of baking, which is beneficial for creating a crispy crust on sourdough bread. The steam helps to keep the surface of the dough moist, allowing it to expand more fully before the crust sets, resulting in a better oven spring and a more desirable texture.
- Pizza Oven: Pizza ovens often reach much higher temperatures than conventional ovens, which can be advantageous for baking sourdough. Baking at temperatures around 450°F to 500°F (232°C to 260°C) can yield a beautifully caramelized crust while maintaining a soft and airy interior, which is ideal for artisan-style loaves.
- Dutch Oven: Using a Dutch oven creates a mini-steam environment that mimics professional baking ovens. Preheating the Dutch oven and baking the sourdough inside allows for excellent heat retention and steam generation, which can enhance the crust’s development and promote a more robust rise during baking.
What Are Common Mistakes to Avoid with Oven Temperature in Sourdough Baking?
Common mistakes to avoid with oven temperature in sourdough baking include:
- Not preheating the oven adequately: Failing to preheat the oven to the desired temperature can lead to uneven baking, resulting in a loaf that is undercooked inside while the crust becomes too dark.
- Ignoring the importance of steam: Not creating steam in the oven during the first part of baking can prevent the dough from expanding properly, resulting in a denser loaf with a less open crumb structure.
- Setting the temperature too low: Baking sourdough bread at a temperature that is too low may cause the bread to rise too slowly, leading to a flat and dense final product instead of achieving a good oven spring.
- Overbaking due to incorrect temperature adjustments: Adjusting the temperature mid-bake without a clear understanding can lead to overbaking, where the crust becomes too hard and the interior dries out, ruining the texture.
- Not using an oven thermometer: Relying solely on the oven’s built-in temperature gauge can be misleading, as many ovens can be off by a significant margin, leading to inconsistent baking results.
Not preheating the oven adequately can cause the initial temperature of the dough to be lower than optimal, which affects how the bread rises and develops its crust. A well-preheated oven helps achieve the desired oven spring, giving the loaf its characteristic height and airy texture.
Ignoring the importance of steam means missing out on the crucial first few minutes of baking where moisture helps the dough expand before the crust sets. This steam can be created by adding water to a hot pan in the oven or using a Dutch oven, which traps the steam around the bread.
Setting the temperature too low results in a longer baking time that can lead to dense bread and insufficient crust development. A higher temperature, typically around 450°F to 500°F, is often recommended to achieve the best texture and flavor.
Overbaking due to incorrect temperature adjustments can lead to a loaf that is not only overcooked on the outside but also dry and crumbly on the inside. It’s important to monitor the baking process closely, particularly during the last stages of baking.
Not using an oven thermometer can prevent bakers from accurately gauging the actual oven temperature, which can vary significantly between different ovens. An oven thermometer provides a more accurate reading, allowing for better control over the baking environment.
Related Post: