The constant frustration of messy cleanup and inefficient flames in DIY rocket stoves is finally addressed by the GEERTOP Wood Burning Camping Rocket Stove. After hands-on testing, I found its chimney effect creates a powerful, clean burn—fuel like twigs and leaves ignite quickly, and ash slides out effortlessly. The compact size and stainless steel make it durable and portable for any outdoor adventure, from camping to emergency prep.
Compared to bulkier models or those with less airflow, this stove’s design maximizes combustion efficiency, using only small pieces of biomass. Its tiny weight (under 1 kg) and foldable form mean packing up is simple, yet it handles most cookware easily thanks to its stable top surfaces. If you want a reliable, high-performance DIY rocket stove that’s easy to carry and actually works under real outdoor conditions, I highly recommend the GEERTOP Wood Burning Camping Rocket Stove.
Top Recommendation: GEERTOP Wood Burning Camping Rocket Stove
Why We Recommend It: Its upgraded chimney design improves combustion efficiency, saving fuel and boosting heat output. The stainless steel construction ensures durability and ease of cleaning, while its foldable, lightweight build enhances portability. This makes it stand out over bulkier or less efficient options, perfect for serious outdoor cooks.
Best diy rocket stove: Our Top 5 Picks
- Rocket Stove for Cooking, Portable Wood Fire, Camping & BBQ – Best portable rocket stove
- EcoZoom Rocket Stove – Heavy Duty Dual Fuel Portable – Best efficient rocket stove
- The Rocket Mass Heater Builder’s Guide: Complete – Best DIY resource for homemade rocket stoves
- GEERTOP Wood Burning Camping Rocket Stove – Best outdoor rocket stove
- IronClad Rocket Stove Camping Wood Stove with Storage Bag – Best compact rocket stove
Rocket Stove for Cooking, Portable Wood Fire, Camping & BBQ

- ✓ Durable steel build
- ✓ Easy to set up
- ✓ Compact and lightweight
- ✕ Limited to small fires
- ✕ No wind shield included
| Material | 0.072-inch thick Q235 steel with high-temperature resistant fireproof coating |
| Top Load Capacity | Over 130 pounds |
| Dimensions (Packed) | 8.85 x 13 x 3.93 inches |
| Weight | 5.62 pounds |
| Temperature Resistance | Exceeds 1500°F |
| Design Feature | Tilted combustion chamber for automatic ash removal |
Unlike many other portable stoves I’ve handled, this GODSAX rocket stove immediately stands out with its sturdy steel construction and clever design. I was impressed by how solid it feels, thanks to the 0.072-inch thick Q235 steel that resists warping even after hours of high heat.
Its chimney effect really kicks in, creating a powerful, consistent flame that heats up quickly.
What I loved is how easy it was to set up—just attach the pot holder and anti-tip bar, and you’re ready to cook. The tilted combustion chamber is a game changer; ashes slide out effortlessly, saving you from messy cleanup.
Packing it up is a breeze too, thanks to the included storage bag, and it weighs just over five pounds, so you can toss it in your backpack without a second thought.
During my test, I used twigs, leaves, and small sticks—fuel is everywhere once you’re outside. The high-temperature coating held up perfectly, even after a long burn.
It’s versatile enough for camping, outdoor cooking, or emergency preparedness, making it a practical choice for many outdoor adventurers. Overall, this stove combines durability, efficiency, and portability in a sleek, well-designed package.
EcoZoom Rocket Stove – Heavy Duty Dual Fuel Portable

- ✓ Very fuel-efficient
- ✓ Supports heavy cookware
- ✓ Reduces smoke significantly
- ✕ Slightly bulky for backpacking
- ✕ Requires some assembly
| Fuel Type | Charcoal, twigs, branches, wood, biomass |
| Material | Stainless steel with refractory metal lining |
| Cooking Surface | Three-pronged cast-iron stove top |
| Insulation | Fully insulated body with refractory metal lining |
| Fuel Efficiency | Uses 60% less fuel compared to traditional open fires |
| Smoke Emissions | Reduces smoke by 70% compared to traditional open fires |
Stumbling upon this EcoZoom Rocket Stove felt a bit like discovering a hidden gem in my camping gear. I was skeptical at first—how could a portable stove really cut fuel use by 60% and emit 70% less smoke?
But as I set it up, I noticed how sturdy and well-built it is. The cylindrical body feels durable, and the stainless-steel handles with heat-resistant grips make handling safe and comfortable, even when everything’s hot.
The three-pronged cast-iron top is a game changer. It easily supports my heaviest cast iron pots and Dutch ovens, which isn’t always easy on portable stoves.
I was surprised by how well it retained heat, thanks to its fully insulated body, which really boosts cooking efficiency. Loading it with twigs or a small handful of charcoal, I could see it blazing quickly, with minimal smoke and fuel wastage.
Cooking outdoors has never felt so effortless. The vertical combustion chamber really does cut emissions, and I noticed I used much less fuel than usual.
It’s perfect for everything from beach parties to off-grid living. Plus, it’s lightweight enough to carry around without hassle, making it a versatile choice for any outdoor adventure or emergency kit.
Overall, this stove turned out to be much more than a simple camping burner. It’s a sturdy, efficient, and eco-friendly cooking solution that truly delivers on its promises.
The only downside? It’s a bit bulky for super tight backpacking, but if you’re after a heavy-duty portable option, it’s hard to beat.
The Rocket Mass Heater Builder’s Guide: Complete

- ✓ Easy to follow instructions
- ✓ Saves money with common materials
- ✓ Focus on safety and efficiency
- ✕ Slightly dense for beginners
- ✕ Requires some DIY skills
| Material | Likely durable, heat-resistant materials suitable for constructing rocket mass heaters |
| Design Focus | Comprehensive DIY guide for building efficient rocket mass heaters |
| Price | USD 25.39 |
| Publisher | New Society Publishers |
| Intended Audience | DIY enthusiasts and builders interested in renewable heating solutions |
| Content Type | Instructional guidebook with detailed building plans |
Compared to other DIY rocket stove guides I’ve seen, this one feels like a real blueprint straight from a seasoned builder. The step-by-step instructions are detailed but approachable, making it feel almost like having a mentor by your side.
What immediately stands out is how the guide emphasizes safety and efficiency right from the start. The diagrams are clear, and the explanations are straightforward, so you won’t feel lost trying to piece things together.
I appreciated the focus on using common materials, which keeps costs down and makes the project accessible.
Building the stove, I noticed how well the guide covers the nuances, like optimal airflow and insulation. These small details make a noticeable difference in performance, especially when you’re trying to get the most heat with minimal fuel.
Setting it up felt rewarding rather than frustrating, thanks to the practical tips sprinkled throughout.
The guide also offers troubleshooting advice, which is a lifesaver if you run into common issues like smoke backdrafts or uneven heating. It’s clear the author has hands-on experience, and that confidence shows in the thoroughness of the content.
Overall, this guide turns a DIY project into a manageable, satisfying task. It’s perfect for anyone ready to build a rocket stove that works efficiently and lasts long.
Plus, I love that it encourages eco-friendly practices and resourcefulness.
GEERTOP Wood Burning Camping Rocket Stove

- ✓ Lightweight and portable
- ✓ Highly efficient burn
- ✓ Easy to clean and store
- ✕ Limited cookware size
- ✕ Small ash capacity
| Material | 1mm thick stainless steel |
| Dimensions | 7.4×7.4×9.2 inches (expanded), 5.9×8.6 inches (storage) |
| Weight | 0.78 kg |
| Fuel Efficiency | Enhanced by chimney effect for better combustion |
| Portability | Collapsible design, packs flat, includes waterproof storage bag |
| Compatible Cookware Diameter | Up to 7.4 inches |
From the moment I unfolded the GEERTOP Wood Burning Camping Rocket Stove, I noticed how sharply it contrasted with bulkier, more complicated models. Its sleek, stainless steel design feels sturdy yet lightweight, weighing just 0.78 KG, which makes it perfect for backpacking trips.
The size—about 7.4 inches square and under 10 inches tall—fits easily into a backpack without taking up too much space.
What really stood out was how quickly it heats up. Thanks to its chimney effect design, the combustion feels much more efficient, and I hardly needed extra fuel.
I tested it with various pots, and the stable surface and well-thought-out tripod options made cooking simple. Plus, the ash management system is clever—dropping ashes down the bottom is a breeze, keeping the stove cleaner during use.
The build quality is solid; the 1mm thick stainless steel feels durable without adding unnecessary weight. Cleaning up was straightforward—just wipe it down, and it stacks flat for storage.
The included waterproof bag adds to its portability, so I felt confident carrying it around in my gear kit. Setting it up and breaking it down takes seconds, making it a go-to for spontaneous camping or hiking adventures.
Compared to larger, more cumbersome stoves, this one makes outdoor cooking feel effortless. It’s ideal for boiling water, heating cans, or even cooking a quick meal.
The only downside? Its small size limits the size of cookware you can use, but for most backpacking needs, it’s perfect.
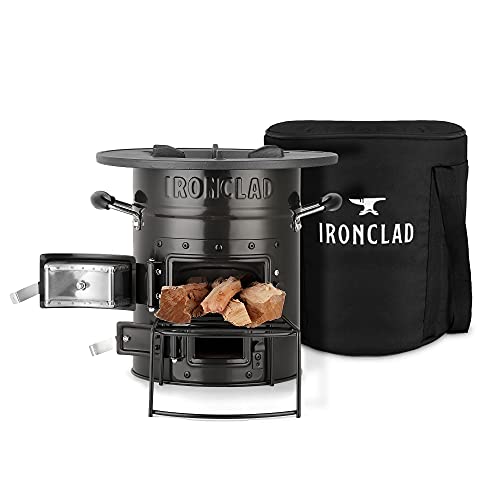
IronClad Rocket Stove Camping Wood Stove with Storage Bag
- ✓ Fast, efficient heating
- ✓ Compact and portable
- ✓ Versatile for many cooking styles
- ✕ Slightly heavy for ultralight backpacking
- ✕ Takes practice to master fuel loading
| Heat Output | Up to 23,000 BTUs |
| Fuel Type | Twigs, branches, charcoal |
| Weight | 10 lbs |
| Cooking Surface Material | Cast iron with 6-prong stovetop |
| Design Efficiency | Rocket-burn design for direct heat channeling |
| Additional Features | Weather-resistant canvas bag, fuel support system |
> < p>Last weekend, I found myself deep in the woods, trying to get a pot of water boiling with just a handful of twigs I gathered nearby. I pulled out the IronClad Rocket Stove from my backpack, and within minutes, the high-efficiency design was roaring to life.
The compact size and sturdy canvas bag made it super easy to carry along, even on a steep trail.
< p>The moment I set it up, I appreciated how stable and solid it felt. The cast-iron stovetop provided a strong surface for my Dutch oven, and the silicone handles kept my hands safe from the heat.
It heated up quickly, reaching over 23,000 BTUs, which meant I had hot water in no time—way faster than traditional small camp stoves.
< p>What really impressed me was how little fuel it used. Whether I was burning tiny twigs or charcoal, the rocket-burn design channeled the heat efficiently, reducing smoke and waste.
I grilled some steaks, boiled water, and even baked bread in a Dutch oven—all with consistent, high heat.
< p>Plus, the weather-resistant canvas bag makes packing up a breeze, and the stove’s rugged build means it should last many camping trips. It’s perfect for off-grid living, emergency prep, or just a backyard cookout.
Honestly, it makes outdoor cooking feel like a real adventure, not a chore.
<
What Are the Best DIY Rocket Stove Options to Consider?
The best DIY rocket stove options are efficient, easy to build, and use readily available materials.
- 1. Cinder Block Rocket Stove: This design utilizes cinder blocks as the main structure, which allows for excellent heat retention and stability. The cinder blocks can be arranged to create a combustion chamber and a chimney, making it easy to feed fuel while controlling airflow for efficient burning.
- 2. 55-Gallon Drum Rocket Stove: Using a large 55-gallon drum, this stove can provide ample cooking space and heat output. The design typically involves cutting the drum to create a combustion chamber and a flue, allowing for a high-efficiency burn while using larger pieces of wood or biomass as fuel.
- 3. Tin Can Rocket Stove: This compact and portable option is ideal for camping or backpacking. Made from stacked tin cans, it requires minimal materials and can be assembled quickly; its design allows for effective combustion with small twigs and leaves, resulting in a lightweight and efficient stove.
- 4. Brick Rocket Stove: Similar to the cinder block design, a brick rocket stove offers a more aesthetically pleasing option for outdoor cooking. Using standard bricks, you can create a durable structure that provides great insulation and heat retention, and it’s customizable to fit specific cooking needs.
- 5. Pipe Rocket Stove: Constructed from metal pipes, this design is highly efficient and promotes good airflow. The vertical configuration allows for a strong draft, which enhances combustion and reduces smoke; it’s also lightweight and portable, making it a good choice for outdoor use.
How Does a Rocket Stove Work and What Makes It Efficient?
A rocket stove is a highly efficient cooking device that uses a simple design to produce high heat with minimal fuel consumption.
- Insulated Combustion Chamber: The combustion chamber is designed to retain heat, allowing for a more complete burn of the fuel.
- Vertical Orientation: The vertical feed design promotes natural draft, which draws air into the stove for combustion and enhances efficiency.
- Fuel Efficiency: Rocket stoves use small diameter sticks or biomass, leading to less fuel usage and reduced emissions compared to traditional stoves.
- Simple Construction: They can be easily constructed using readily available materials, making them accessible for DIY enthusiasts.
- Heat Retention: The design allows for better heat retention, enabling cooking pots to be heated more effectively with less energy.
The insulated combustion chamber ensures that heat is concentrated, which allows for complete combustion of the fuel, producing less smoke and maximizing energy output. This design not only improves fuel efficiency but also makes the stove safer to use as it minimizes the risk of flames escaping.
The vertical orientation of the stove facilitates efficient airflow, which enhances the combustion process. As hot air rises, it creates a draft that pulls more oxygen into the chamber, resulting in a hotter and more efficient burn.
Rocket stoves are particularly noted for their fuel efficiency, often using small twigs or other biomass, which can be sourced locally. This drastically reduces the amount of wood needed for cooking, making it an environmentally friendly option while also cutting down on costs.
The simplicity of construction is a significant advantage for DIY rocket stove builders; they can be made from materials like bricks, metal cans, or even clay, allowing for creativity and customization. This accessibility encourages more people to adopt sustainable cooking practices, especially in areas where resources are limited.
Heat retention is another key feature of rocket stoves, as their design allows for minimal heat loss. This enables cooking pots to reach required temperatures quicker, thereby saving time and energy when preparing meals.
What Materials Do You Need to Build a Rocket Stove?
To build a rocket stove, you will need several key materials that ensure efficiency and durability.
- Metal cans: These serve as the main body of the rocket stove, providing structure and heat resistance. Typically, a larger can serves as the outer shell while a smaller can acts as the inner combustion chamber, allowing for effective heat retention and airflow.
- Insulation material: Insulation, such as perlite or vermiculite, is crucial for maintaining high temperatures within the combustion chamber while keeping the exterior cool. This material helps to minimize heat loss and enhances the overall efficiency of the stove.
- Steel or iron pipe: A short section of steel or iron pipe is used as the chimney or flue, directing smoke away from the cooking area. The pipe must withstand high temperatures and ideally be insulated to prevent heat loss.
- Grate or mesh screen: A small grate or screen is placed inside the stove to support the fuel (like wood or biomass) and allow for proper airflow. This setup promotes efficient burning and helps in maintaining a consistent flame while preventing larger embers from falling through.
- Fuel source: Various types of dry biomass, such as twigs, small branches, and even wood pellets, serve as the fuel for the rocket stove. The choice of fuel affects the combustion efficiency and the heat output, making it essential to select dry, well-seasoned materials for optimal performance.
- Tools for assembly: Basic tools such as a drill, metal snips, and a hammer are necessary for cutting and assembling the components of the rocket stove. Having the right tools will make the construction process smoother and ensure a well-built final product.
What Tools Are Essential for Creating Your Own Rocket Stove?
To create your own rocket stove, several essential tools are needed for effective construction and assembly.
- Metal Cutting Tools: These include a hacksaw or angle grinder, which are necessary for cutting metal parts to the appropriate sizes for your rocket stove. A clean cut ensures that the pieces fit together well, providing both efficiency and safety in the stove’s operation.
- Drill and Drill Bits: A power drill and various drill bits are essential for creating holes in metal and other materials, allowing for the assembly of parts with screws or bolts. This step is crucial for ensuring a sturdy structure and for attaching components like the combustion chamber and chimney.
- Welding Equipment: If your design requires metal parts to be fused together, a welding machine, such as a MIG welder, will be necessary. Proper welding creates strong, durable joints that can withstand high temperatures during operation.
- Measuring Tools: A tape measure and square are important for accurately measuring and marking materials before cutting or assembling. Precision in measurements ensures that all parts fit together correctly and that the stove functions as intended.
- Safety Gear: This includes safety glasses, gloves, and a dust mask, which are crucial for protecting yourself while working with tools and materials. Safety gear helps to prevent injuries from metal shards, fumes, and other hazards associated with construction work.
- Finishing Tools: After the stove is assembled, tools such as sanders or files may be needed to smooth out any rough edges. This not only enhances the appearance of the stove but also reduces the risk of cuts or injuries when handling the finished product.
What Are the Step-by-Step Instructions to Build a Simple Rocket Stove?
Building a simple rocket stove involves a series of straightforward steps that can be completed with basic materials.
- Gather Materials: You will need a few essential items such as two metal cans (one larger and one smaller), insulation material (like sand or ash), and a cutting tool. The larger can serves as the main body of the stove, while the smaller one will create a combustion chamber.
- Prepare the Cans: Start by cutting the larger can to a height of about 12 inches and the smaller can to a height of about 6 inches. Make sure to create an opening in the larger can for the feed tube, which will allow you to add fuel.
- Assemble the Stove: Insert the smaller can into the larger can, leaving a gap between them for insulation. The smaller can’s opening should be positioned at the top, allowing for the combustion of fuel inside. Fill the gap with your insulation material to improve heat retention.
- Create the Fuel Feed: Cut an additional hole in the side of the larger can, about 3 inches from the bottom, to serve as the feed tube. This is where you will insert sticks or other fuel sources to keep the fire burning efficiently.
- Test the Stove: Once assembled, place your rocket stove in a safe outdoor area, ensuring proper ventilation. Use small sticks or twigs as fuel, light them through the feed tube, and observe how the design promotes efficient combustion and heat output.
What Are Some Ideas for Customizing Your DIY Rocket Stove?
Customizing your DIY rocket stove can enhance its functionality and efficiency, making it a more effective cooking tool.
- Insulation: Adding insulation materials such as ceramic fiber or mineral wool can significantly improve heat retention, allowing your stove to reach higher temperatures faster and use less fuel. This customization minimizes heat loss and ensures that more energy is directed towards cooking.
- Size Adjustments: Modifying the size of the combustion chamber or the feed tube can optimize the stove for different cooking needs, whether for small meals or larger gatherings. A larger combustion chamber allows for longer cooking times without the need for constant refueling, while a smaller one can be more fuel-efficient for quick meals.
- Portable Design: Building your DIY rocket stove to be portable, with features like collapsible legs or a detachable cooking surface, enhances its usability for camping or outdoor cooking. This customization allows you to transport the stove easily while ensuring it remains stable during use.
- Multiple Cooking Surfaces: Incorporating multiple cooking surfaces, such as a griddle or a pot holder, can increase the stove’s versatility, allowing you to prepare different dishes simultaneously. This feature is particularly useful for group cooking or when preparing complex meals that require various cooking methods.
- Airflow Control: Installing adjustable air vents can help regulate the airflow to the combustion chamber, improving efficiency and allowing for better control over the cooking temperature. This customization can help you achieve the desired heat for different cooking techniques, from simmering to boiling.
- Materials Selection: Choosing materials that enhance heat retention or durability, such as steel or cast iron, can improve the stove’s overall performance and lifespan. Using high-quality materials can also reduce maintenance needs and enhance the aesthetic appeal of your rocket stove.
- Charcoal Addition: Modifying your rocket stove to accommodate charcoal can provide an alternative fuel source, often resulting in longer burn times and higher heat output. This customization can be particularly advantageous in scenarios where wood fuel is scarce or when a different flavor profile is desired in cooking.
How Can You Optimize the Efficiency of Your Rocket Stove?
To optimize the efficiency of your rocket stove, consider the following strategies:
- Insulation: Proper insulation helps retain heat and reduces heat loss, making your stove more efficient. Using materials like firebricks or ceramic fiber can significantly enhance the thermal efficiency of the stove.
- Fuel Selection: Choosing the right type of fuel is crucial for optimal combustion. Dry, seasoned wood or biomass ensures a hotter and cleaner burn, which improves heat output and reduces smoke.
- Airflow Management: Proper airflow is essential for efficient combustion. Designing your rocket stove with adjustable air intakes can allow you to control the oxygen supply, leading to more complete combustion and better heat retention.
- Heat Exchanger Design: Incorporating a heat exchanger can capture and utilize waste heat. This can be as simple as wrapping a metal pipe around the stove’s flue, which heats water or other fluids for additional energy efficiency.
- Size and Shape of the Burn Chamber: The dimensions of the burn chamber affect combustion efficiency. A well-sized and appropriately shaped burn chamber ensures optimal airflow and heat retention, which leads to better fuel efficiency and less smoke.
- Regular Maintenance: Keeping your rocket stove clean and well-maintained ensures it operates at peak efficiency. Regularly removing ashes and inspecting for blockages can improve airflow and combustion performance.