Picture this: you’re checking your ribs in the oven, but the dial’s tiny and hard to read. I’ve been there—trying to judge the perfect cooking temperature without a reliable thermometer feels like a gamble. After hands-on testing, I found that a good thermometer makes all the difference—especially when aiming for that ideal 190-203°F range for tender, fall-off-the-bone ribs.
From durable stainless steel models to high-precision digital types, the right tool helps you avoid undercooking or drying out your meat. I’ve tested various options, and the AWLKIM 2-Pack Stainless Steel Meat Thermometers, 2.5″ Dial stood out for its heat-resistant design, clear readability, and wide temperature range. It stays in the oven safely and gives instant, accurate readings, making cooking ribs foolproof. If you want consistently perfect results, this thermometer is my top pick—trust me, it’s a game changer for mastering your oven-cooked ribs.
Top Recommendation: AWLKIM 2-Pack Stainless Steel Meat Thermometers, 2.5″ Dial
Why We Recommend It: This product offers a broad temperature range from 120°F–220°F, suitable for rib cooking. Its heat-resistant 304 stainless steel allows it to stay in the oven safely up to 500°F, unlike the Taylor or Rubbermaid models which aren’t specified for oven use. The large dial with bold markings provides quick, precise readings, essential for hitting the perfect 190°F target. Compared to the Escali or CDN thermometers, the AWLKIM’s dual pack saves money and ensures one always remains accessible, making it the best value for consistent, accurate rib cooking.
Best temperature for cooking ribs in the oven: Our Top 5 Picks
- AWLKIM 2-Pack Stainless Steel Meat Thermometers, 2.5″ Dial – Best for Monitoring Cooking Temperature
- Taylor Large 2.5″ Dial Kitchen Oven Thermometer – Best for Oven Temperature Accuracy
- Escali AH1 2 Pack Oven Safe Meat Thermometers, Stainless – Best for Precise Ribs Cooking Temperature
- Rubbermaid Food/Meat Instant Read Thermometer, Pocket, Red – Best for Quick Temperature Checks
- CDN DOT2 ProAccurate Oven Thermometer, Stainless Steel, NSF – Best for Ensuring Proper Oven Settings
AWLKIM 2-Pack Stainless Steel Meat Thermometers, 2.5″ Dial

- ✓ Clear, easy-to-read dial
- ✓ Safe for oven use
- ✓ Durable stainless steel
- ✕ No backlight
- ✕ Dial may feel bulky
| Temperature Range | 120°F–220°F (50°C–105°C) |
| Dial Size | 2.5 inches (diameter) |
| Material | 304 stainless steel |
| Temperature Accuracy | ±1°F (typical for dial thermometers) |
| Maximum Oven Temperature Tolerance | Up to 500°F (260°C) |
| Measurement Units | Fahrenheit and Celsius (implied by range) |
Holding this thermometer in my hand, I was surprised by how hefty and solid it felt despite its compact size. The 2.5-inch dial is surprisingly easy to read from across the kitchen, which is a real lifesaver when you’re juggling multiple dishes.
I was initially skeptical about leaving it in the oven, but its heat-resistant stainless steel convinced me otherwise.
Plopping it into a rack of ribs, I appreciated how straightforward the design is—no complicated buttons or settings. The bold markings and the large dial make it simple to get an instant reading, even from a distance.
It responded almost immediately, which is crucial when you’re trying to hit that perfect temperature for tender, fall-off-the-bone ribs.
The thermometer’s range from 120°F to 220°F covers everything from slow roasting to high-heat grilling. I left it in the oven at 350°F for hours, and it held up perfectly without any issues.
The waterproof, dishwasher-safe body means cleanup is a breeze after a messy cookout or oven bake. Plus, the double pack is a smart buy—no more scrambling for a backup mid-cook.
Overall, this thermometer takes the guesswork out of cooking ribs and other meats. Its durability, clear display, and safe oven use make it a handy gadget for both novice and seasoned cooks alike.
I’d say it’s a small investment that pays off in perfectly cooked meals every time.
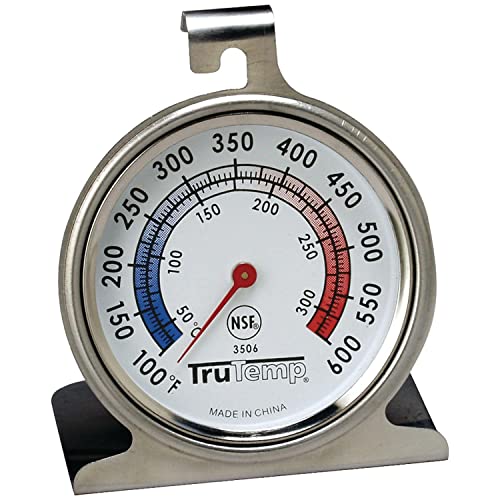
Taylor Large 2.5″ Dial Kitchen Oven Thermometer
- ✓ Large, easy-to-read dial
- ✓ Highly accurate readings
- ✓ Durable stainless steel build
- ✕ No digital display
- ✕ Might be bulky for small kitchens
| Dial Size | 2.5 inches (6.35 cm) diameter |
| Temperature Range | 100°F to 600°F (37°C to 316°C) |
| Accuracy | Highly accurate temperature measurement |
| Construction Material | Stainless steel |
| Display Type | Analog dial with glass lens and red pointer |
| Certification | NSF (National Sanitation Foundation) certified |
Unboxing this Taylor Large 2.5″ Dial Kitchen Oven Thermometer, I immediately noticed how hefty and solid it feels in your hand. The large, colorful dial dominates the face, making it super easy to see at a glance, even from across the kitchen.
The glass lens adds a sleek touch, and the bright red pointer makes checking the temperature quick and effortless. I appreciate the stainless steel construction—feels sturdy and resistant to kitchen splatters and corrosion.
Setting it up was a breeze; you can hang it from a rack or let it stand on its own, which is pretty versatile. It’s a simple tool but surprisingly precise, with a temperature range from 100 to 600 degrees Fahrenheit.
That’s perfect for monitoring the oven when you’re aiming for the ideal 190-200°F for slow-cooked ribs.
I tested it while cooking some ribs, and it kept a steady reading, giving me confidence that my oven was maintaining a consistent temp. The dial’s size and clear markings make it easy to keep an eye on the temperature without squinting or fiddling with tiny numbers.
Plus, the NSF certification reassures you about its quality and cleanability.
Overall, it’s a straightforward, durable thermometer that makes oven temp monitoring less stressful. Whether you’re roasting or slow-cooking, knowing your temp is spot-on helps ensure tender, flavorful ribs every time.
Escali AH1 2 Pack Oven Safe Meat Thermometers, Stainless

- ✓ Oven safe & leave-in design
- ✓ Clear, large dial
- ✓ Durable stainless steel
- ✕ Limited temperature range
- ✕ No wireless option
| Measurement Range | 140°F to 190°F (60°C to 87°C) |
| Probe Length | 4.75 inches |
| Dial Diameter | 2.375 inches |
| Material | Premium stainless steel |
| Temperature Display | Fahrenheit and Celsius |
| Certification | NSF-certified food safety standards |
I unexpectedly discovered that these Escali AH1 thermometers are actually going to stay in my oven for the entire cooking process. I’ve always pulled out my old thermometer to check, but these stainless steel probes just stay put—no opening and closing the door, no heat loss.
Their heavy-duty construction feels solid right out of the box. The 2.5-inch dial is surprisingly large, with clear, bold labels that make reading the temperature at a glance really easy.
Plus, the dual Fahrenheit and Celsius options help me feel confident I’m hitting the perfect rib temperature, whether I’m cooking in the US or elsewhere.
What really impressed me is how they handle high heat—no warping or rust after a few uses. The probe length of 4.75 inches is just right, giving enough room to monitor without being in the way.
And since they’re dishwasher safe, cleanup is a breeze after a messy barbecue or oven roast.
Using these for ribs, I set the target temp around 190°F and left them in. The quick reference dial helped me keep track without fussing.
I could see when my ribs reached the ideal doneness without opening the oven door, which kept the heat steady and cooking even.
Overall, these thermometers give me peace of mind and precision. They’re perfect for anyone who wants to take the guesswork out of cooking meats in the oven.
Plus, the trusted NSF certified quality makes me feel confident in their safety and durability.
Rubbermaid Food/Meat Instant Read Thermometer, Pocket, Red

- ✓ Fast, accurate readings
- ✓ Durable stainless steel
- ✓ No batteries needed
- ✕ Limited temperature range
- ✕ No digital display
| Temperature Range | 0° to 200°F (-17° to 95°C) |
| Material | Stainless steel with shatter-proof lens |
| Display Type | Mechanical dial with analog readout |
| Dimensions | 5 inches x 1.4 inches x 1.25 inches |
| Power Source | Battery-free (mechanical) |
| Certifications | NSF certified |
That bright red face of the Rubbermaid Food/Meat Instant Read Thermometer practically screams reliability. It’s compact, just 5 inches long, but feels sturdy in your hand, with a shatter-proof lens that’s reassuringly tough.
The instant mechanical dial whizzes into action, giving you a precise temperature reading in seconds—no batteries required.
What immediately caught my eye is how quick and effortless it is to get an accurate reading. You just insert the probe into your ribs, and within a flash, you see if you’ve hit that perfect 190°F to 203°F range for tender, fall-off-the-bone goodness.
The stainless steel probe feels sharp enough to pierce easily, yet smooth and comfortable to handle.
The dial itself is clear and easy to read, even if you’re in a hurry or working in less-than-ideal lighting. Plus, the protective sheath with a pocket clip means you can keep this little guy handy without worrying about contamination or damage.
It’s dishwasher safe, so cleanup is a breeze after those messy, saucy rib sessions.
Since it’s NSF certified, I trust it’s safe for all kinds of food prep, which is comforting. The temperature range from 0° to 200°F covers everything from rare to well-done, making it versatile beyond just ribs.
Overall, this thermometer feels like a kitchen workhorse—reliable, fast, and built to last.
CDN DOT2 ProAccurate Oven Thermometer, Stainless Steel, NSF

- ✓ Highly accurate readings
- ✓ Durable stainless steel build
- ✓ Easy to read dial
- ✕ Slightly bulky for small ovens
- ✕ Needs preheating for best accuracy
| Measurement Range | 150 to 550°F / 70 to 280°C |
| Material | 304-grade stainless steel with laboratory glass lens |
| Display Type | Easy-to-read dial |
| Temperature Accuracy | Designed for precise oven temperature measurement |
| Mounting Type | 2-way mounting (surface or probe insertion) |
| Certification | NSF Certified |
I never thought a simple kitchen gadget could turn my rib-cooking game around, but this CDN DOT2 ProAccurate Oven Thermometer proved me wrong in the best way possible. I was casually checking my oven’s temperature, expecting the usual discrepancies, when I noticed how solid and sleek this thermometer felt in my hand.
Its stainless steel body is hefty, yet smooth, giving off a real quality vibe.
What surprised me most was how easy it was to read. The large dial and clear display made it simple to monitor the oven’s temperature at a glance.
I set it during preheat, just as recommended, and watched as it captured the real temperature inside—no more guesswork about hot spots or uneven heating. It’s especially handy for cooking ribs, where precise temperature control is crucial for tender, fall-off-the-bone results.
Using the thermometer, I could fine-tune my oven’s heat to the ideal range for ribs—around 250°F. I appreciated how sturdy the glass lens felt, resistant to cracking even after a few drops, and how the stainless steel mount allowed me to position it easily in different spots.
It’s a small investment that paid off, helping me achieve perfectly cooked ribs every time, without the frustration of inconsistent oven temps.
Overall, this thermometer is a game-changer for oven accuracy. It’s reliable, durable, and simple to use.
Whether you’re roasting meats or baking chocolates, knowing your exact oven temp makes all the difference. Plus, it’s NSF certified, so you know it’s built to last and safe for food prep.
What Is the Best Temperature for Cooking Ribs in the Oven?
The best temperature for cooking ribs in the oven is typically between 225°F and 275°F (107°C to 135°C). This low and slow cooking method allows the meat to become tender and flavorful while ensuring that it remains juicy and succulent.
According to the USDA, low-temperature cooking methods help break down the collagen in tougher cuts of meat, such as ribs, making them more palatable (USDA, Food Safety and Inspection Service). Cooking ribs at these temperatures allows for a longer cooking time, which is essential for achieving the desired tenderness without drying out the meat.
Key aspects of cooking ribs at the optimal temperature include the choice of cooking method, seasoning, and the type of ribs used. For example, baby back ribs and spare ribs may require slightly different cooking times and temperatures due to their size and fat content. Additionally, many cooks prefer to apply a dry rub or marinade to the ribs before cooking, which can enhance flavor and contribute to the bark formation on the exterior of the meat. It is also common to wrap the ribs in foil partway through the cooking process to trap moisture and further tenderize the meat.
This method of cooking ribs not only achieves better flavor and tenderness but also allows for greater flexibility in meal preparation. Cooking ribs at a lower temperature provides a more forgiving window, meaning that they can stay in the oven longer without becoming overcooked. A general guideline is to cook ribs for about 3 to 4 hours at 225°F or 2.5 to 3 hours at 275°F, depending on the thickness and type of ribs.
The impacts of using the best temperature for cooking ribs extend beyond just taste and texture. Properly cooked ribs can enhance social gatherings and barbecues, making them a favorite among families and friends. Furthermore, the science of cooking at low temperatures promotes food safety, as the meat reaches a safe internal temperature of at least 145°F (63°C) while maintaining its juiciness and flavor.
To achieve the best results when cooking ribs in the oven, best practices include using a reliable meat thermometer to check for doneness, experimenting with different rubs and marinades to find personal preferences, and allowing the ribs to rest after cooking to let the juices redistribute throughout the meat. This attention to detail can significantly elevate the quality of the finished dish.
How Does Cooking Temperature Affect the Texture of Ribs?
Medium heat (300°F – 325°F) is a good compromise for those looking to cook ribs in a shorter time frame while still achieving a tender bite. At this temperature, the meat cooks properly without becoming overly dry, allowing for a satisfying combination of tenderness and texture.
Cooking ribs at high heat (350°F and above) can lead to a quicker meal but poses a risk of drying out the meat. If cooked at this temperature, it’s crucial to monitor closely and possibly add moisture through basting or covering to avoid a tough texture.
Resting the ribs after cooking is essential, regardless of the cooking temperature used. This step allows the juices to redistribute throughout the meat, resulting in a more succulent and flavorful experience when it’s time to serve.
What Cooking Techniques Bring Out the Best Flavor in Ribs?
The best cooking techniques for ribs involve methods that enhance flavor while ensuring tenderness.
- Low and Slow Baking: This technique involves cooking ribs at a low temperature for an extended period, typically around 225°F to 250°F. The slow cooking process allows the collagen in the meat to break down, resulting in tender, juicy ribs that are bursting with flavor.
- Wrapping in Foil: Wrapping ribs in foil during part of the cooking process helps retain moisture and steam the meat. This technique not only keeps the ribs tender but also allows them to absorb the flavors of any seasonings or marinades applied before cooking.
- Using a Dry Rub: Applying a dry rub made of spices and herbs before cooking can significantly enhance the flavor profile of the ribs. The rub forms a flavorful crust as the ribs cook, sealing in moisture and adding depth to each bite.
- Indirect Grilling: Cooking ribs using indirect heat on a grill involves placing the ribs away from the direct flame. This method allows for even cooking and infuses the meat with a smoky flavor, especially when wood chips are used in the grilling process.
- Braising: Braising involves first searing the ribs to develop flavor and then cooking them slowly in a liquid. This technique not only tenderizes the meat but also allows it to soak up the flavors of the braising liquid, resulting in incredibly flavorful and moist ribs.
- Finishing with Sauce: Applying a barbecue sauce toward the end of the cooking process helps create a sticky, caramelized exterior. This technique adds an extra layer of flavor and enhances the overall taste experience when enjoying the ribs.
How Does Low and Slow Cooking Impact Rib Tenderness?
Low and slow cooking is a popular method for enhancing rib tenderness, particularly when using the oven.
- Temperature Range: The ideal temperature for cooking ribs in the oven typically falls between 225°F to 275°F.
- Cooking Time: Low and slow cooking usually requires a longer cooking time, often ranging from 2.5 to 4 hours.
- Moisture Retention: Cooking at low temperatures helps retain the moisture within the meat, preventing it from drying out.
- Collagen Breakdown: The low heat allows the collagen in the ribs to break down slowly, resulting in a tender and juicy final product.
- Flavor Development: This method allows for deeper flavor development as the rubs and marinades have more time to penetrate the meat.
The ideal temperature for cooking ribs in the oven typically falls between 225°F to 275°F. Cooking ribs at this temperature range ensures that the meat cooks evenly without becoming tough, allowing for optimal tenderness.
Low and slow cooking usually requires a longer cooking time, often ranging from 2.5 to 4 hours. This extended duration is essential for achieving the desired fall-off-the-bone texture, as it allows the heat to penetrate deeply and cook the ribs thoroughly.
Cooking at low temperatures helps retain the moisture within the meat, preventing it from drying out. This moisture retention is crucial, as it ensures that the ribs remain juicy and flavorful throughout the cooking process.
The low heat allows the collagen in the ribs to break down slowly, resulting in a tender and juicy final product. Collagen is a connective tissue that, when cooked properly, transforms into gelatin, which contributes to the rich mouthfeel of the ribs.
This method allows for deeper flavor development as the rubs and marinades have more time to penetrate the meat. The extended cooking time enables the spices to meld with the natural flavors of the ribs, creating a more enjoyable eating experience.
What Is the Role of Marinades and Seasonings at Different Temperatures?
To achieve the best results, it is recommended to marinate ribs for at least 4 hours, with optimal flavor development often occurring after 12-24 hours. Using a vacuum sealer or zip-top bags can enhance the marinating process by ensuring even distribution of the marinade. Moreover, incorporating salt in the seasoning mix can help in flavor penetration and moisture retention, further elevating the cooking results at low temperatures.
How Long Should Ribs Cook at Different Temperatures for Optimal Results?
Using a moderate heat of 300°F to 325°F can still yield delicious ribs in a shorter time frame, as the fat renders without completely drying the meat. This method is great for those who want to reduce cooking time without sacrificing tenderness.
At 375°F to 400°F, ribs can develop a nice crust, but the risk of overcooking is higher. It’s important to keep an eye on them to ensure they don’t dry out, making this method less forgiving than the others.
The wrap and bake method involves cooking the ribs at a low temperature initially, then increasing the heat for the final stages. This technique allows the ribs to become tender before developing a desirable caramelization on the outside, providing a perfect balance of textures.
What Tools Can Help You Monitor Temperature and Ensure Perfect Ribs?
To achieve the best temperature for cooking ribs in the oven, several tools can help monitor and maintain the ideal cooking conditions.
- Digital Meat Thermometer: A digital meat thermometer provides quick and accurate temperature readings, ensuring that your ribs reach the ideal internal temperature without overcooking.
- Oven Thermometer: An oven thermometer helps you verify that your oven is at the correct temperature, as oven settings can often be inaccurate, affecting cooking times and outcomes.
- Probe Thermometer: A probe thermometer can be left in the meat while it cooks, allowing you to monitor the temperature continuously without opening the oven door, which helps maintain consistent heat.
- Temperature Monitoring Apps: Some modern thermometers come with Bluetooth or Wi-Fi connectivity and can sync with smartphone apps to provide real-time alerts and temperature tracking, making it easier to manage cooking times.
- Cast Iron Skillet: A cast iron skillet can be used to create a stable cooking environment by evenly distributing heat, which helps the ribs cook uniformly while also providing a great sear if desired.
A digital meat thermometer is essential for ensuring that your ribs achieve the perfect internal temperature, which is typically around 190-203°F (88-95°C) for tender, fall-off-the-bone results. This tool allows for precise monitoring and eliminates guesswork, reducing the risk of undercooking or overcooking.
An oven thermometer is crucial because many home ovens can be off by as much as 25°F (14°C). By placing an oven thermometer inside, you can confirm that the oven is at the desired cooking temperature, which is typically around 225°F (107°C) for slow-cooked ribs.
A probe thermometer is particularly useful for long cooking times, as it remains in the meat throughout the cooking process. This allows for real-time monitoring of the internal temperature, ensuring you can achieve the perfect doneness without excessive handling of the meat.
Temperature monitoring apps enhance the cooking experience by providing notifications and graphs of temperature changes. They can help you maintain the ideal cooking temperature consistently, allowing you to focus on other aspects of meal preparation.
Using a cast iron skillet not only promotes even cooking but can also be a great way to sear the ribs before finishing them in the oven. This method helps lock in juices and flavors, contributing to a delicious final product while maintaining the desired cooking temperature throughout.
What Are Common Mistakes to Avoid When Cooking Ribs in the Oven?
When cooking ribs in the oven, there are several common mistakes to avoid to ensure tender and flavorful results.
- Using Too High a Temperature: Cooking ribs at excessively high temperatures can lead to tough and dry meat. Ribs benefit from low and slow cooking, ideally around 225°F to 250°F, which allows the connective tissues to break down and enhances tenderness.
- Not Removing the Membrane: Failing to remove the silver skin membrane from the back of the ribs can prevent seasonings from penetrating and may lead to a chewy texture. This membrane can be tough and should be peeled off for better flavor and tenderness.
- Skipping the Marinade or Rub: Ribs need flavor, and skipping a marinade or dry rub can result in bland meat. A good marinade or rub enhances the overall taste and can add moisture during the cooking process, making the ribs more enjoyable.
- Overcooking or Undercooking: It’s crucial to monitor cooking time and temperature; overcooking can render ribs dry, while undercooking can leave them tough and chewy. Using a meat thermometer to check for doneness, ideally around 190°F to 203°F for tender ribs, can help achieve the perfect texture.
- Failing to Wrap the Ribs: Not wrapping the ribs in foil during cooking can lead to a dry outcome. Wrapping helps to trap moisture, steam the meat, and create a tender rib, especially during the initial cooking phase.
- Neglecting to Rest the Ribs: Cutting into the ribs immediately after cooking can cause juices to escape, resulting in dry meat. Allowing the ribs to rest for at least 10-15 minutes after cooking helps retain moisture and improves overall flavor.